Showing posts with label Planner stickers. Show all posts

Thursday, November 5, 2015

Fruity Listing in my Happie Planner Insert

I'm in complete love with the October happie planner kit. In Australia we are just starting summer so it's extra perfect for those of us in the Southern Hemisphere!
The happie planner fauxdori insert this month has tons of pages perfect for making lists!
I really love having this insert in my confettidori for those days and times when you need to make some serious lists to get your thoughts and plans organised!
I'm heading on a big trip to South Korea, so needless to say I have been making a lot of lists in preparation for this trip!
I especially love that with these inserts you don't need to do a lot of decorating! They are super cute as is!  All I've added here is a couple of stickers, a few bits of washi, and one of the awesome little tags from the kit!

One of my favourite things about this month's kit is the little packet of washi strips. Inside the packet is a little card that is perfect for wrapping washi tape samples around so you can take them with you on the go!  How nice is that?!

Hoping to see lots of fruity lists popping up all over the Internet! Till next time! 😘

Teddi

Things that I used in this post.
Fruity Washi Tapes
Mini Dew Drop Stickers
Tutti Frutti Tags
Tutti Frutti Fauxdori Inserts

Thursday, September 17, 2015

September Setup with Happie Scrappie Planner Kit


Hi it’s Mits! I missed you last month, so I’m back here to say a quick hello and to show you how I’m using my goodies.  

If you follow me on Youtube, you may have already seen the video unboxing of the awesome Happie Scrappie August Planner Kit, but I wanted to write a short accompanying post as well. (The video link is posted at the end)


Who says washi tape is only for decorating borders and straight lines? I decided to cut out the stars and use them as stickers to decorate the blank dates in my monthly calendar.  The colours are soft enough and the stars are small enough that it adds just the perfect touch to a blank calendar page.


The next thing I used were the page flags. What’s awesome about these page flags are the fact that they’re transparent. If you know me, I love transparent sticky notes.  I used this page flag to highlight one of my monthly goals.  (I know..it says “monthly debrief”, but I use it to set my goals hehe)


Next are these super pretty journaling cards. I absolutely love them.  I think Sarah and Sam did a wonderful job with these!  


If you are new to the planner world, you may wonder how you could incorporate these into your planner.  You could stick them in your planner as decoration, but I like to use them for my to-do list as well.  Because these pretty journaling cards are double sided, I decided to tip it into my planner with some washi tape and use the backside for my to-do list.   


… and yes, that’s right. You see a super cute September calendar printable.  If you aren’t a part of the Happie Scrappie Facebook group, don’t forget to join.  Not only will you get tons of inspiration from fellow planner addicts, but you can get these super adorable printables for FREE! 


I’m having so much fun with this makeup theme, but I’m really looking forward to this month’s monster theme as well.  How are you enjoying your Happie Scrappie goodies? Don’t forget to hop onto the FB group and share your ideas J 


Things I used in this post.

Happie Scrappie August Kit
Travel Notebook - Popsicle Theme


Cloud and Dew Drops Stickers


Monday, July 6, 2015

Injecting Organisation and Fun Into A House Move

Hello, everyone! This is Wan (aka wansplansandexplorations on IG) here. Thank you very much for joining me on today’s blog post. I hope you are ready to have fun with some Happiescrappie goodies!
I am pretty sure most people would agree with me that a house move is super stressful, not least because there are one million and one things to do, and inevitably, some important things get forgotten till the very last minute.  I have moved more than 10 times in my life (with some cross continental moves), and one would think that it would be a walk in the park for me by now, but sadly, I still struggle every time I move, the last being 3 years ago. Well, no matter how much I detest moving, we have another move coming up in about 7 weeks, and this time around, I am determined to stay (more) organised, especially when I have a 4 year old who is always ready to throw a spanner in the works.  I also figure that if I have to stay organised, I might as well have some fun while doing it. And what better way to have fun than involving some gorgeous planner supplies in the mix, right? So today, I am going to show you how I used Happiescrappie’s fauxdori planner kit to help me with my house move.
First up, the cover of the fauxdori. I usually decorate the covers of my inserts to go with whatever I am using them for.  However, look at how pretty this insert cover is! I can’t bear to cover it up, so I just left it as it is. I reckon it can even serve as a reminder to me to try and embrace and love the journey.


Now for the inside of the insert. Happiescrappie (aka Sam) has designed the week to be on one page with the other page being grid style.  Such a layout, in my opinion, is really flexible and I will now show you how I have customised it so that it completely serves my needs for this house move.  First, I used the skinny washi tape included in the planner kit to divide the page with the week printed on into two. The left hand column is for any appointments scheduled for that day while the right hand column is for any to-dos I have to accomplish on that day.  To distinguish between the two columns, I stamped the heading “to do” at the top of the right hand column. I also stamped a checklist in that column so that I can check things off as they get done. It is simple, but very effective for me. 


For the grid style page, I am using it as a reminder page for the people I need to contact and the things I have to buy/order that week. This works well for me in view of the fact that I usually make phone calls or write emails as and when I have time, and it is therefore much better that I do not schedule them on a certain day but rather, keep it fluid for that week. And as many of you know, there is often a wait between ordering furniture and appliances and their delivery date, so it is important that I get things ordered by a certain week in the countdown to our move. To make things extra clear on the page, I used stickers included in the kit for the two headings “To contact” and “To buy” (I must admit to using last month’s stickers for these headings because Sam usually includes so many that I never use them up in any particular month). I also use a cute binder clip from Sam to attach the contact details of the people I have to reach that week to the page. This way, I have them close at hand and do not have to waste time looking for anything when I have a minute to make that phone call or fire off that email. 


So there you have it, the insert that would act as House Move Central in the remaining 7 weeks I have till the move. As you can see, this layout works really well for me because while I have appointments and to-dos for a particular day, I also have certain to-dos/deadlines that are more to do with that week and those could be laid out in the opposite page.  


I hope this post has been useful and has given you some ideas on how you can customise Happiescrappie’s inserts to your own needs. And from this last picture, I am sure you can appreciate that the planner kit includes a ton of goodies that are geared specifically towards helping you on this journey.  Have a great week, and happy planning! 

Thursday, July 2, 2015

How I Use Fauxdori Inserts As My Social Media Planning


Hi Happie Planners, my name is Lucy (IG: @organisedlucy). I hope all of you are having such an awesome week so far. Today I am going to show you how I use the fauxdori inserts from HappieScrappie planner kit.


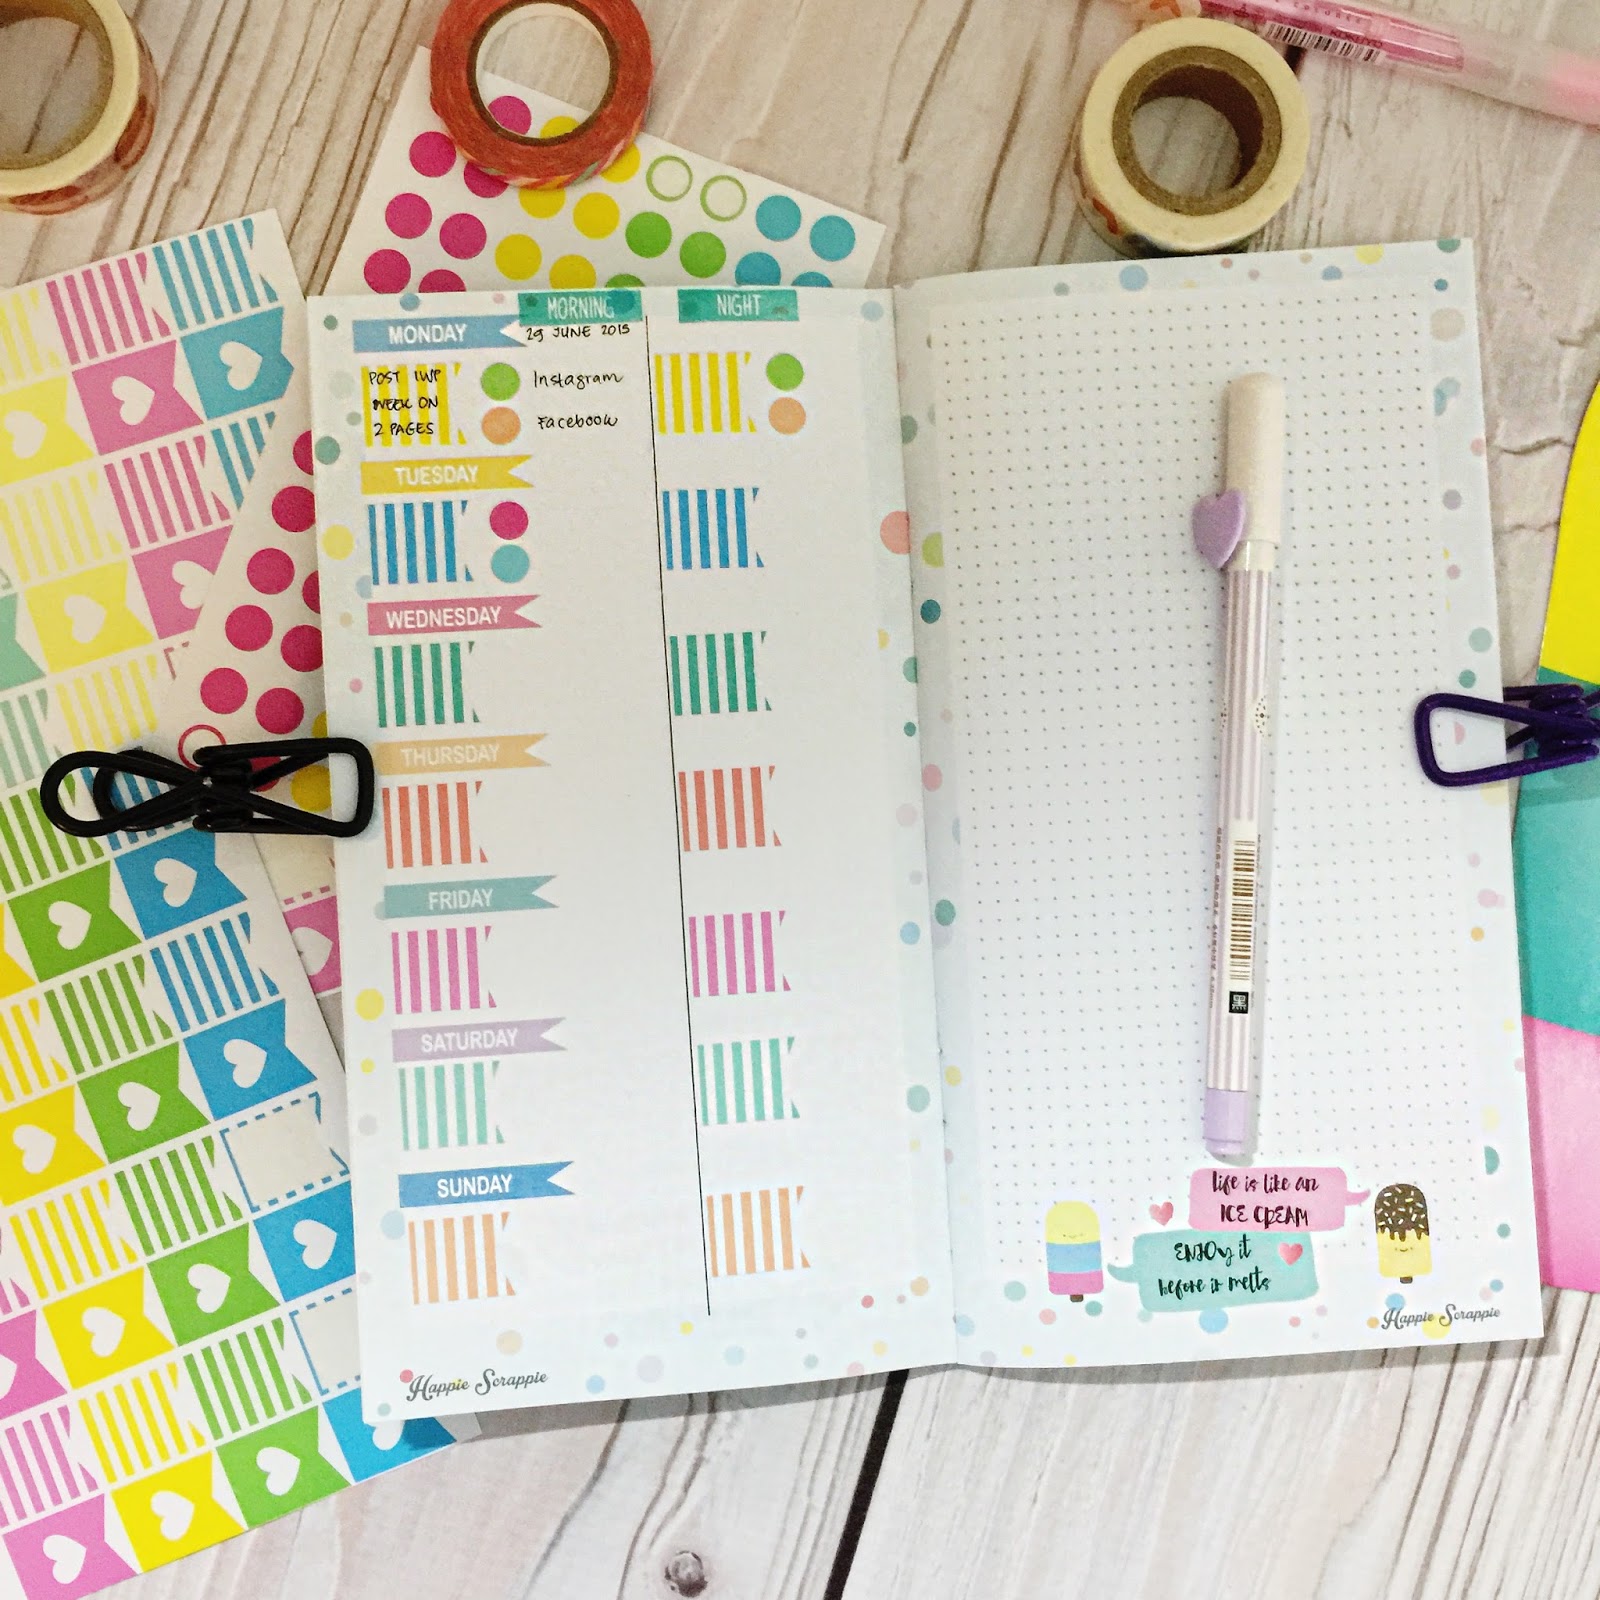
Starting this week I have decided to use the fauxdori inserts as my social media planning. My goal is to regularly post two pictures everyday into the social media, i.e. Facebook and Instagram, as I have the habit of not consistently posting pictures on social media in the past few weeks due to the commitment of daily work schedules. 

To start the processes, I decided to draw a line on the fauxdori inserts to separate between "Morning" and "Night" because I will post one picture during morning and another one in the evening.

You know that I always love bright and pastel colors, so when I received my fauxdori inserts, I instantly fell in love it, as it is very colorful, pretty and cute. However I decided to add more ingredients to spice up the inserts. So I decided to add the banner stickers and mini dots stickers. I wrote the daily posting idea on the banner stickers and I used the mini dot stickers to serve as the checklist boxes. 


For the notes page, I like to decorate it with some stamping. I chose Kellie Stamps (TODAY Collection). I decided to stamp on HappieScrappie Notepad and paste it on the notes page. I love that the June kit's notepad has a watercolor background which compliment the fauxdori inserts really well. 


Lastly it won't be complete without putting some final touches on the first page. I decided to incorporate the journaling card to serve as a positive reminder and the doodled heart and banner stickers that came with the planner kit as decoration.


I hope all of you enjoy my first blog contribution. Happy Fourth of July to those who celebrate and Happy Weekend to all of you.
XOXO
Lucy

PS: For more happie planning, do follow my instagram @organisedlucy if you have not done that :)

Happie Scrappie Products that I use

Happie Scrappie Planner Kit
Happie Scrappie Journal Cards
Happiedori

Monday, May 18, 2015

Planners | From Project Life Pockets to Planner Storage

Hello hello there! Today I am gonna share a simple post on how I use the pocket sleeves from Simple Stories in one of my A5 sized planner to store my Shop Evalicious goodies (like stickers, journaling cards and paper clips).


Sorry for the glare but this is the best photo i could get to show you a rough idea how the plastic sleeve (in 6x8 size) would look like in a Kikki K Large planner. In general, Kikki K large planner (which is equivalent to Filofax A5 size) is slightly wider, thus I did not trim down the sides of the sleeves as they just fit nicely.


And now, let's get started to turn this Project Life sleeves into planner pockets. All you need is a single hole punch and 6x8 plastic sleeve ( mine are from Simple Stories and i love love love their quality)


I just use one of the A5 size insert to determine where the holes should go. The original 2 holes on the sleeves actually match up with the 2nd and 5th holes of my 6-ring binder.


And here's how the sleeves look like in my A5 sized planner. Nothing is peeking out but when you close the binder, the sleeve might touch the elastic pen loop a little bit but it doesn't bother me at all as I don't really keep my pen there.


For this page, I actually fill up all the pockets with planner stickers. I actually use a paperclip from Shop Evalicious to hold the pocket to prevent the stickers from falling out of the pocket. I usually make my stickers in 3.75' x 5.75', so they are just perfect to be slotted into the 4x6 sized pocket.

p.s the hot air balloon and dew drop stickers can be found in my shop.


I added some journaling cards and Instax photo to the back of this pocket.


And for the sleeve, I actually store some washi tapes sampler and also paper clips. I just trim the 3x4 journalling card a little smaller than 3' and wrap washi tapes around. And for storing paper clips, I cut two slits with my trusty paper trimmer, and added the clips.


And more pics on how each sleeve looks like. This pockets are also perfect for storing memorabilia, receipts and name cards. I hope you have fun using some of your scrapbooking stash in your planners!

Have a great day ;)


Xoxo,
Sam


Evalicious products used: