Showing posts with label AmyTangerine. Show all posts

Monday, July 28, 2014

Layouts⎪XoXo

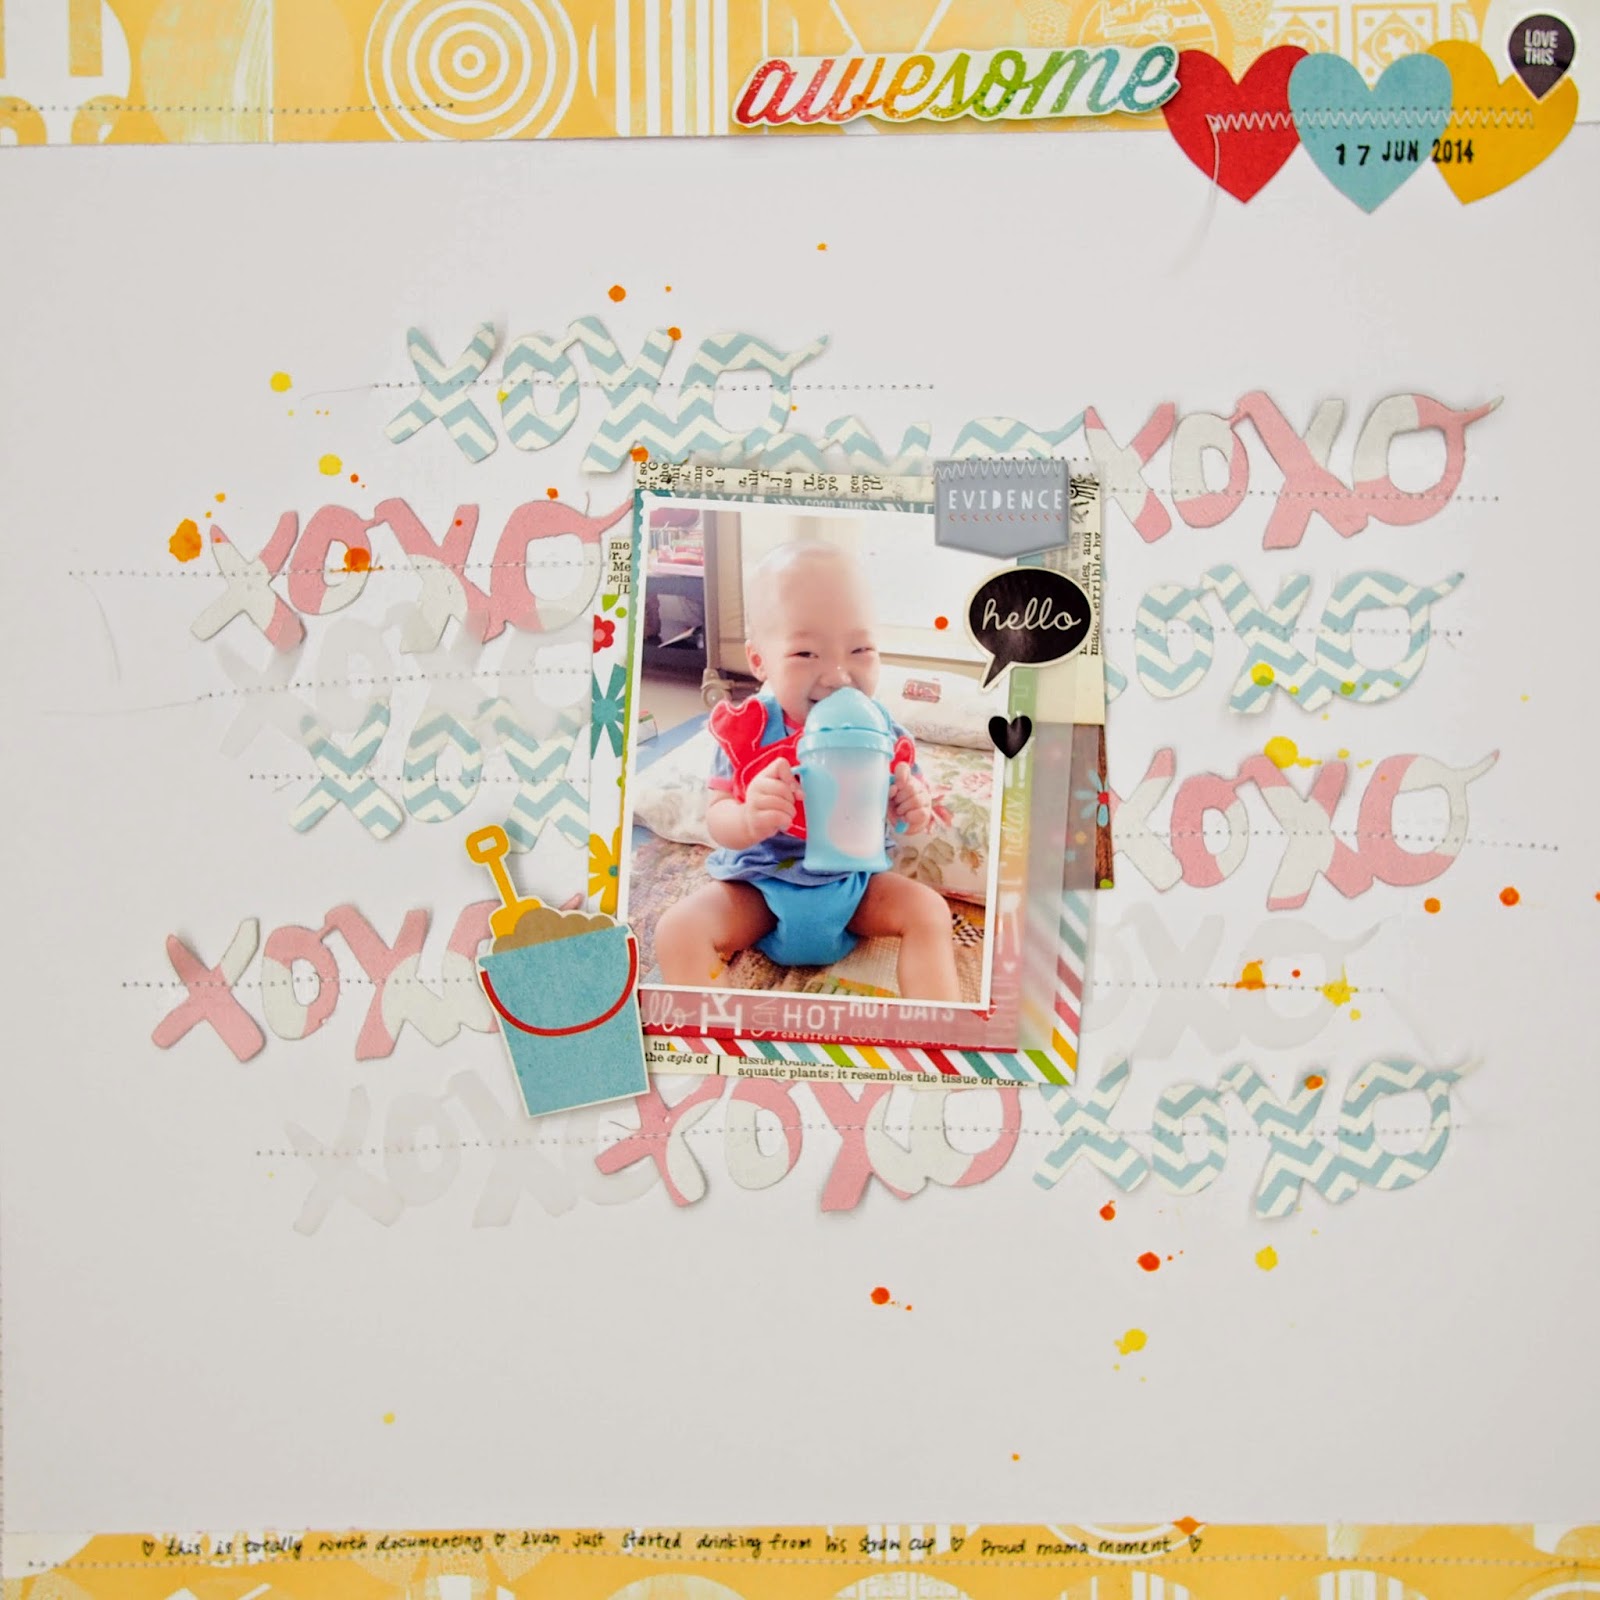
Hello there! I have been lazy with maintaining my blog again this month. I have this layout sitting in my draft folder for weeks and now I finally push the publish button to show you guys here!

I am totally in love with these dies by Amy Tangerine and Dear Lizzy when American Crafts just launched the new die set. I used these dies a lot for cutting patterned papers, vellum, felt and even cork sheet. *Enabler aper* you can get yours at Citrus Twist Kits store too!


For this layout, I want the XOXO die-cut to be the focus of the layout so I die-cut as many as I could with blue, pink patterned papers and some vellums. Then used them as background. I believed I have channeled the awesome Paige Taylor Evans in me when I piece all the XOXO die cuts together. I love how Paige's layouts are always quilting inspired and the way she uses a lot of patterned papers in her pages. Okay, my layout is no where to be as pretty as hers, but i really love how the die-cut background turned out.


More close-ups of the die-cuts. It was quote painful (Ahem, I mean tedious) to roll the die cuts again and again. But it is also very fun and therapeutic when you keep repeating the same things ;)


I also add some machine stitching to every XOXO die cuts because I didn't use much adhesive to stick them on my page and want them to be floating on the background. (Not sure if it make any sense ;))


Thanks for looking! And now, go here to get this set of dies! Its one of the must have dies, I kid  you not!

XoXo,
sam-sig

Friday, June 20, 2014

Layout⎪Sequin Pockets and XoXo *Evalicious*


Hello lovelies! This is my last layout two share on Shop Evalicious blog for this DT term. So much love for their stamps and puffy stickers! 

Before I started making my layouts, I decided to make some sequin pockets using some of the Evalicious stamp sets. To view my full tutorial on how to make sequin pockets, click here. They are so easy make that you can make a bunch of this under an hour or so.


There is no secret that I love all the Evalicious stamps and always try to incorporate as many stamp as possible into my layouts. And here's a happy layout that I have used a lot of stamps:


I heat embossed the stamp image using my heat gun and white embossing powder on a piece of white card stock. Then I wet the card stock and added Peerless Watercolor to create my own background. I am loving the subtle effect that the stamp imaged show through.


More close-up of the background can be seen here:


Thanks for looking!

XoXo,
sam-sig

Supplies used:


Wednesday, December 11, 2013

Layout⎪XoXo *Citrus Twist Kits*

Hello there! Today I have a layout up on Citrus Twist Kits blog using the Glitz Design Finnley 6x6 paper pad that come in December Pocket Life Kit. To be honest, i would not pick up this paper pad if I see it in my local store just because I have never scrap any layouts in Lime Green before. But guess what, when I started cutting up papers to do this layout, I am sold! I ran to the store and bought one more of this paper pad just because I am hooked! I am loving the lime green! 

This is a 12x12 layout with a super huge A4 sized photo. Scrapping a huge photo sounds intimidating to me because that means I do not left with much space to play with after adding photo to my 12x12 background. But gosh! I did this layout partially I have printed the photo wrong size. I am inspired by Jina Jean (our December guest designer) who has been scrapping huge photo layout after gotten her new printer. After I added the A4 sized photo to my white card stock, I only left with 3 inch width space to play with. I start cutting a few pieces of green patterned papers and added them to the left of my photo. And then I just embellish each box with random cut-outs from CTK printables sheet and embellies kit.

XoXo

Love the pink-red-white twine that came with December kit packaging. It is such a waste to throw it away right? I also love how the lime green patterned paper matches my neon top so well ;) It is such a coincidence, I didn't purposely dress up in this colour to scrap a lime green layout.

PB291249

I cut up the stitched journaling card and made it into a pocket to tuck in my hidden journaling.

PB291250

PB291248

I absolutely love that the December kit has hint of christmasy colours yet it is perfect for day-to-day layout. Thanks for looking! 

P.S. The green Thickers from American Crafts and butterfly vellums are from my stash.

Sunday, December 1, 2013

Layout⎪Joy & Wish *Write Click Scrapbook*

It's 1st of December that means I am sharing my layout for Write.Click.Scrapbook December gallery. Today is an extremely special to me - just because it's my Mr. Handsome's birthday! Gonna leave baby with mom and go out for a nice dinner with him! ;)

The theme for December gallery is 'Holiday Tradition'. To be honest, I don't think I ever have one because I don't celebrate Christmas per se. Then I passed by Starbucks and found out that the Christmas mugs and tumblers are here! And this inspired me to create a layout for my mug fetish ;P Ah yes, my holiday tradition (since 4 years ago) is to collect a Christmas edition Starbucks mug. Frankly speaking, I have been getting more than ONE mug since last year simply because I just adore all the cute mugs & tumblers. LoL

I have set a few challenges for myself (again) when creating this layout:
1. Scrap a double-pager (my first time scrapping a double 12x12) —> Inspired by Janna Werner's video - 2 pages, 1 design, 2 colours
2. Scrap a monochromatic layout
3. Create a Christmas layout without any christmas supplies

Picking supplies was pretty easy - For the left page I go with red/green/gold, the traditional Chritsmas colour. So I mainly use papers from Elle's Studio Penelope collection. And for the right page, I use blue/silver/grey, to make it looks like a snow/winter layout.

PB111085Joy & Wish

And here's my double page layout. I actually prefer the left page more than the monochromatic layout because everything just feels wrong =P I am used to working with a lot of colours in my projects!


PB141092Joy & Wish


Left page - using all the red / free / gold here. I think it looks kinda Christmasy even though I use non of the Christmas products here. Maybe the Gold Thickers added a lot of christmasy effect here.

PB141092Joy & Wish-2


PB141095Joy & Wish


Typing journaling with my pink tappy. It's has really cure script font!

PB141096Joy & Wish


PB141097Joy & Wish

Right page: Going with blue/ silver / grey here and using lots Amy Tangerine Cut & Paste collection here.


PB141092Joy & Wish-3


PB141098Joy & Wish


Stickles are must-haves for christmas layout to make my layout merry & bright ;)

PB141099Joy & Wish


PB141103Joy & Wish


That's for my layout for Write.Click.Scrapbook gallery. Thanks for looking!

sam-sig

Wednesday, November 27, 2013

Project Life⎪Week 45 *Citrust Twist Kits*

Hello there! It's Wednesday and I am sharing a llayour-cum-PL on Citrus Twist Blog today. Just a quick note: this month I made total 4 weeks Project Life spread + a layout using just the PL kit + PL embellies kit. Cant believe that? I only sneak in 2~3 pieces of 12x12 patterned papers, white card stocks, Thickers and gelatos  (which are my staples whenever I work on my projects) and ta-dah! 4 PL pages and 1 layout is done.

I total spent 35 minutes on this simple layout (which doesn't include the time I print and edit photo).
30 minutes - looking for the Dear Lizzy 6x6 pad
5 minutes - on a layout

Gentle reminder to self: Keep my supplies organised so that I would spend more time scrapping than looking for stuff ;) Since I only spent 5 minutes working on the layout, I would share with you how I did it. This is actually the left page of my PL week 45.

I decided to make it in a 12x12 layout this week simply because I am lazy to work on each individual pocket. Don't get me wrong. I love decorating each and every pocket but sometimes I do have time constraint in keeping my PL up to date and I found this 5-minute layout works extremely well for me.

PL Week 45


Steps:
1. Print 4 photos of 2.5'x2.5'. Gotta be smaller than 3 inch each so that we could fit 4 photos on a piece of 6x6 paper.
2. I just work on my routine - laying white card stock on a piece of 12x12 paper from my stash. These are my staples that I breath, eat, drink my white cardstocks. It shows how important they are to me.
3. Once background done, I tear 3 pieces of 6x6 papers from the paper pad. Ok, these ar emu last 3 pieces so I have no choice at all! *LOL*
4. Layer the 3 pieces of papers as photo mat, then arrange the printed photos in grid style. You can never go wrong with a grid layout right?
5. I didn't have much embellies on hand, so I hand cut and punch out some shapes to create my own banner. And also added a fussy cut flowers from the paper pad at the bottom right to create a cluster.
6. Can never call it done without some mist splatter right?

Note: the title '45' is from the June/July CTK kit.

PB151181


Making your own banner is always easy. Cut some square, triangles and rectangle, punch out some half-circle then stitch them down. You have your own cute little banners. Easy way to perk up any page!

PB151183


Fussy cut flowers and exclusive wood chips to create a simple cluster.

PB151184

A few days after I am done with the week 45 spread, I was thinking why not making this into a double page layout since I have a few more photos form my Week 45. Then I used the same steps but now working on 9 photos for the right spread. And this took me total 10 minutes! I absolutely love this week spread because i only sent 15 mins to get it done and it also looks different from my usual weekly spreads in pockets!

PB191191

And here's the right page of Week 45: 


PB191187


I typed the journalling with my pink tappy. The cursive font is to die for! Did you notice that I didn't stamp the specified date on each of the photo? Because all these happened in week 45 so I guess I shouldn't be too particular with the exact date. Else stamping the date might take up another 5-10 mins of my time ;)

PB191199


PB191197


PB191196


Thanks for looking! Do share with me once you have created a 5-10 minutes layout!


sam-sig

Friday, October 11, 2013

Layout⎪1st DT Assignment for *Made With Love*

Hello beautiful! Happy Friday and I am finally back posting one of my layouts and 2 cards for Made With Love Singapore. YEs, you read me right, I am currently on Made With Love Sg (our local scrapbook store) design team and it is definitely a dream-come-true for me. I still remember 2 years ago when I found out about this pretty scrapbook shop at Plaza Singapore and was standing in front of Piradee's layout in awe. Believe it or not, I even applied to work as their store assistant but didn't get it eventually.

And today I am sharing a layout (very very pink indeed) that feature my friend + my boy's photo. I printed all 4 of them because I have vowed to scrap more than 1 photo in my layout this month. I have put these photos on my Project Life but still couldn't pass up scrapping them on a 12x12. There are lots of Amy Tangerine, Prima Marketing Inc and Simple Stories goodies here.

I am still pretty much in love with cutting papers into strips and add them to a piece of white card stock. It works really well for someone who love using a many patterned papers as possible in a project.

PA090745

Here's some of the close-up:

I have applied some American Crafts Zazz in Antique Gold (its glitter glue by AC) on the white doilies die cut to jazz things up. Loving how subtle the shimmer is. Definitely recommend y'all to stock some up for upcoming Xmas projects. The 'LAUGH' words are cute vintage trinkets from Prima Marketing Inc Finnabair. They have little holes that you could string them up to make necklace or bracelet.

PA090753

PA090752

PA090751

PA090749

PA090750

And I made TWO cards too! When was the last time I made a card? Weeks or even months ago! The cute cut-out from Amy Tangerine Cut & Paste layered with the heart transparency from AC Dear Lizzy Polka Dot Party makes card making so easy.

PA090844

Another simple cards using AC Amy Tangerine Thickers and Maya Road heart wood veneers. I covered the wood veneers with Glitz & Freckled Fawn washi tapes and loving how it turned out. It is just another way of covering your wood chips with tapes instead of using embossing powder, inks or paints. I prefer the fuss-free and mess-free ways.

PA090847

List of Supplies:
Papers - American Craft - Amy Tangerine Cut & Paste, Dear Lizzy Polka Dot Party
Embellishments - Stickers (Prima Marketing Inc - All About Me), Vintage Trinkets (Prima Marketing Inc), Layered Stickers (Simple Stories - I Heart Summer), Wood Chips (Maya Road)
Alphabets - American Crafts Thicker 
Dies - My Favourite Things (Doilies dies)
Others - American Crafts Zazz Glitter Glue, Craftwell eBosser, Sewing machine

Thanks for looking and have a great weekend ahead! All the supplies could be found at Made With Love Singapore. I am gonna make a trip down to Made With Love this weekend to pick up the new acrylic paints and adhesive. If you happened to bump into me, please say HI to me!

Do check out the blogs by other DT girls from Made With Love too!
Yvonne  

XoXo
sam-sig

Tuesday, March 12, 2013

Project Life: Week 9 With A Matchbook Mini

*whoopsie! i titled my blog post as Week 10, should be Week 9 instead!*

Hello there! How's the progress of your Project Life? I am still coping well with catching up my weekly spreads and most of time I ended up with too many photos. So some photos i used them on my layouts, some I do flip-flap cards to store in PL album and some I store them in a mini. This week I am gonna show you a matchbook mini I did by following prompts on Two Peas In A Bucket tutorial: In The mood To Scrap.

* Gentle reminder: This is a photo heavy post as I have tons of photos of my mini albums here ;) 

Bright and colorful spreads using mainly Amy Tangerine's Yes, Please collection

And here's the close up of my matchbook mini in my album.

I don't use any Becky Higgin's PL sleeves just because I couldn't get them as a variety pack here. So I bought different sizes of pockets (in 12x12) from American Crafts, Echo Park Photo Freedom and We R Memory Keeper. I am not too fussy with the size of my pockets. I actually like to incorporate different sizes of pockets so that I can try doing my pages a lil' different every week. Btw, what's your favorite sleeves?

Didn't do much journaling here and no Flip-flaps in action here since I have added a mini album.

Title card on the right page. At least I am trying t be creative here. Oh ya, I hand-stitched the sun ray on the title card by following Amy Tangerine's prompt on TwoPeas. If you have been following my blog post, you would have noticed I am a big fans of Two Peas free classes and I always try to incorporate those prompts and techniques in my recent projects. 

Here's the close-up of my matchbook mini:
Mainly using Amy Tangerine: Yes, Please and a little bit of Dear Lizzy: 5th & Frolic. I have bought only one collection kit of Yes, Please and made 2 layouts, a 2-page PL spread + a mini. I still couldn't kill the kit completely >_< A little papers really go a long way!! 
And I am in love with the Yes Please acrylic stamp! I stamped them on white card stock and color them with Inktense. Added a bit of Stickles add some interest . 

The complete title for this mini is: It's time to say goodbye, well almost...
Its a mini album to store pictures of my foster doggie, Sasha when i bid her farewell. It ended up she didn't go to a new foster home (that explains the 'well almost...' part of the title). And little did I know, I gotta send her away to long term boarding place as I gotta be bed rest and wait for the arrival of my baby boy. I couldn't take care of her in these few months so I return her to the rescue group after 3 months of fostering. 

photos of her making a big mess!

I think I will add some journalling on the left page here. 

Journalling and title were type & printed using Ali Edwards' Script Font. You can download in for free from Creating Keepsakes website here.


Last page of the album. 

Thanks for looking! XoXo. I hope my project did inspire you in a way or two ;)