
Since some of my IG friends asked me how I created the splatter, so I am going to share this super AWESOME paint splatter technique by using Tim Holtz Distress Stain today. It's easy-peasy minus the mess! Can't believe it right?
I must give credit of this awesome technique to Merdrey, my scrapbooking teacher from Paper Market. I saw her created beautiful splatter on her DayBook via Instagram and asked her for tips. She even went to the extend to whatsapp me a video. Thanks babe! She mentioned that she learnt this technique from Sharon Ngoo ;) Love how these awesome scrapbookers are so generous in sharing wonderful techniques right?
I made a simple video using iPhone. Please don't judge me on my video taking skill. I hardly ever take video.
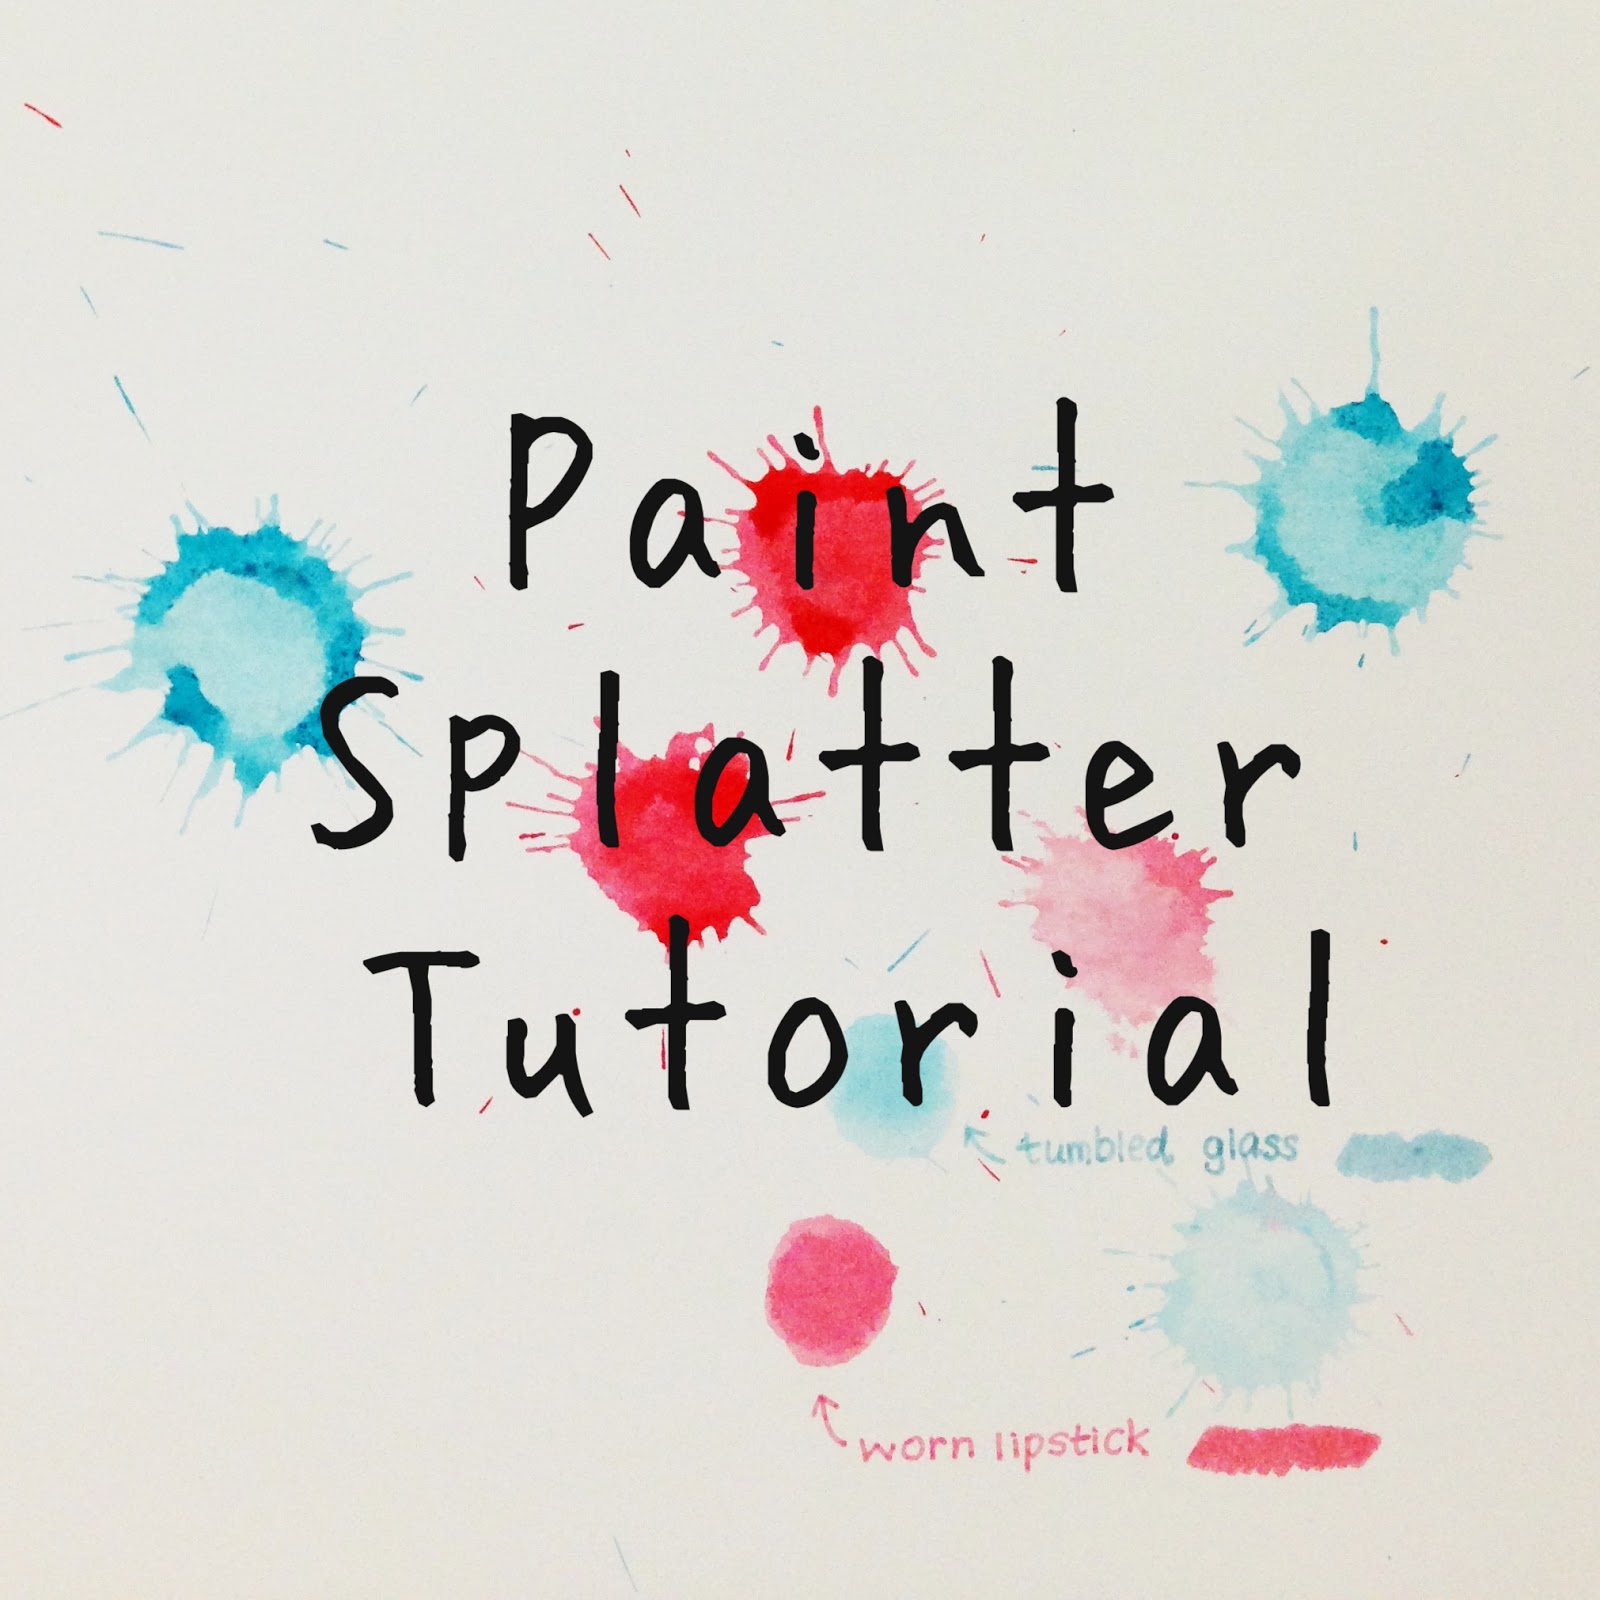
Here's the photo of different splatters I created. I used Distress Stain in Worn Lipstick & Tumbled Glass in the video. And these are all the colors I have. I have tried creating the splatter with Metallic Stain but it just didn't work as well as these, just not as liquid as the normal Distress Stain. *yougetwhatimeant*

1 & 2 >> I dabbed the Distress Stain on the paper without squeezing the bottle. They just look like polka dots. I could see myself making my own polka dots journalling cards / filler cards in the future.
3 & 4 >> I squeezed the bottle a little and dabbed on the paper. Then I used paper towel to dab dry. The colors are more subtle and washed out. This is my fave technique!!
5 − 8 >> Squeezed the bottle a little before dabbing on the paper. LEt dry / dry with heat gun. The colors are more intense and looks more like watercolor effect.
** I wrote the words 'tumbled glass' & 'worn lipstick' using my distress markers. **
** Now that I am loving this technique and have ordered a few more bottles of Distress Stain like Black Soot, Picket Fence & Mustard Seed)
A few examples of my Distress Stain technique:

On the journaling that I printed on a piece of white cardstock

On my Week 11 title card (It's very subtle as I dabbed it dry with paper towel)

Adding a splash of color to background or patterned paper

On my matchbook album (it's not a mini as it measures at 6 x 12 inches) ;)
I hope I have enabled you to get a few bottles of Distress Stains. Yepes, I am such an evil enabler. Have fun, XoXo.
Way to go! i enjoy visiting your blog :)
ReplyDeleteOMG love the little elephants and your tips on paint splatter ! ALl your work is absolutley gorgeous!
ReplyDeleteAwesome, thanks for the tutorial, I need to get me some paint and try that. I was trying with one of those dabbers and it worked out as well, I love those big splatters!!
ReplyDeleteAnd your matchbook and PL cards are great great, love yor colorful style!! :)
Great tutorial!! I'm going to order some bottles of distress stain too ... I don't have a single one yet as I didn't really know what to do with them! Thank you so much!(going to share your tut with a few friends too!).
ReplyDeletedistress stain on HS color magic alpha, right
ReplyDeleteWhat a fun post! I have several Distress Stain Dabbers & never thought to use them that way. I just tried it! Super cute! Thanks so much for the post.
ReplyDeleteI popped back to share a post with you. I have some cute misting & stamping layouts on my Enikö's Playhouse blog I think you'd enjoy. Hugs! http://enikodelisle.typepad.com/enikos-playhouse/
ReplyDeleteThanks for sharing the tut! Love it!
ReplyDeletethese are great effects, and they look easy too. the candy wrapper card is so fun. :)
ReplyDeleteYou're a very bad influence .... I've now got to go shopping for distress stains lol
ReplyDeleteThat looks awesome! Thank you so much for this little tutorial video!
ReplyDeleteIn_Heidelberg