
Hello Everyone! I have a a simple step-by-step post on Shop Evalicious blog to show how I make my own planner dividers and use various Shop Evalicious stamp sets to make own own patterned papers + rainbow tabs. If you look closely, those tabs aren't perfectly aligned / have straight edge. I am such an IM-perfectionist! *LoL* But those rainbow colours are seriously to die for.
This is a very photo-heavy post so I made the step-by-step into a simple collage.

This is basically a set of B&W dividers for my Kate Spade planner (equivalent to Filofax in Personal sized) with some colourful rainbow tabs. I was inspired by Erin Joy's video about her planner setup for 2015. I love how she set her filofax up in simply B&W.
1. I was looking for B&W patterned papers from my stash to match my black Kate Spade planner.
2. Okay, I cheated, I sneaked in 2 pieces of paper with a tiny bit of pastel colour.
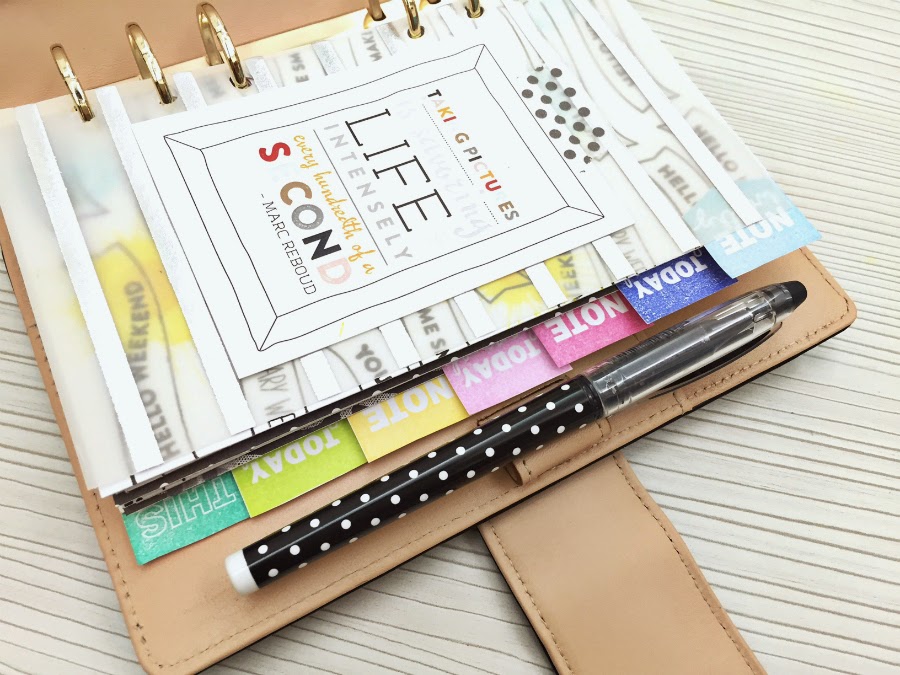
3. Then I decided to stamp repetitive patterns to make my own patterned papers. I use Love Today stamp set to make this divider + add a tiny stripe of polka dots MT tape.
4. Then I wanted to have a typewrite & Banner patterned divider - so I made my own using Field Note Clear Stamp Set & Daily Life Clear Stamp Set.
5. Here's a peek of the 3 dividers that I made with stamping repetitively.
6. I couldn't stand that it is only in B&W so I added some paint splatter and water-colour using Distress Stain & Peerless Watercolor.
7. Then I used the inserts from my Kate Spade planner to use as a guide to punch the 6-holes for all the dividers.
8. I decided to stamp a few banners using Solid Banners Stamp set with various Versacolor ink pad.
9. I finally picked out 7 banners that I like which is in the following colours - form Blue to pink to yellow and green.
I stick the page tabs that I made with stamped banner with tape glue. Then send them to hot laminate. p.s. I took pictures of the dividers before I laminate them to avoid the glare.
And here's a peek of the individual dividers.

Products Used:


Xoxo,
Sam
SO NICEE <3
ReplyDeleteWow – I love the pictures! Want all this stuff, too. You’re making me jealous!
ReplyDeleteAlso the design of your whole blog is really pretty, girl! ♡
I’m following you via gfc & look forward for your next post. You’re great – keep going! ♡
Adoorablee.blogspot.com ♡
The resource that you mentioned here is something that I have been looking from quite a time. And finally it ended with such a nice blog post. Don’t have words to thank you.
ReplyDeleteMcx Trading Tips
Absolutely beautiful! I love it! :D
ReplyDeleteYour planner is so cute!!
ReplyDeleteBeautiful!
ReplyDeleteI am very grateful to thank you for this creative post!! its very difficult to find this kind of creative idea over the web. Have a look on Epic Research
ReplyDeleteI love how they design awesome .This is done by only experts,
ReplyDeleteclick here: Intraday stock tips!
Wonderful art, nice post...
ReplyDeletePremium Stock Future
This comment has been removed by the author.
ReplyDeleteAll your blog is very nice.
ReplyDeleteTutor Web3
I have read your articles many times and I am always inspired by your tips and knowledge. Thank you for sharing.
ReplyDeleteIntraday Trading Tips
I got here much interesting stuff. The post is great! Thanks for sharing it! Fruit Shaped Stress Balls
ReplyDeleteThis is very nice blog because information provided here through the article and the pictures are very effective. Home school tutor Greenwich Because sometimes words cannot explain the things that pictures can and here the words and pictures both are expressing the things in balance.
ReplyDelete