Today I
want to show you how to use the Happie Scrappie Inserts for
Project Planning. I am sure all of us are surrounded by projects in our daily
life whether it is at work or at home. I made it a goal in
2015 to be organised. However it is really challenging for me to
keep things organised especially my work desk at home. Sounds
horrible right?!
So, when
I received the September Happie Scrappie planner
kit, my gut feeling told me that the inserts are perfect
for this project. This time, I requested un-punched inserts so that I could
easily slot in all the inserts into The Happy Planner, as I frequently carry
The Happy Planner everywhere I go.
My all-time
weakness for organisation is the tendency to procrastinate when it
comes to cleaning and tidying up all the stuffs. I seriously hope I am not the
only one here. However, this time I am really determined to
be organised no matter what. I have multiple reasons to do that. One
of them is whenever i have a messy desk situation, I have this overwhelmed feeling
which in turn resulted in lack of focus and distraction. I also read before that when you have a clean and tidy work space, it sorts of enhance the creativity of the brain. Well, more reasons to have an organised and pretty looking work desk, so that whenever I sit
down and look at the pretty things around me, I will feel inspired and so
motivated to start something great.
Without
further ado, let’s have a look at the inserts that we got from Monster theme
planner kit. Soooo exciting!!

I decided
to use the insert with eight boxes in a sheet. This insert is perfect
to cater for different information that you need to start on the
project. I started by labelling each box with the
header stickers to mark “PROJECT INFORMATION”, “PROJECT GOALS”,
“THINGS TO SORT” and “MOTIVATION”.
I used the
small dots stickers that I have left over from previous kit to list the
project goals. In addition, I used the heart checklist banner to list
the things that I need to sort. The stamping images on the
motivation box served as an encouragement for me to kick start the
project. I always believe the more colorful my insert is - the more motivated I will be to start and finish this project. :)


Do you know
that Sam had sent out a newsletter with a link to download
free printables for A5 and Personal Size to subscribers?
Woohoo!! I definitely took advantage of the cute A5 free printable.
This one is called the Brain Dump Insert. I used the brain dump
insert to record my favorite websites or blogs to
go for inspiration.


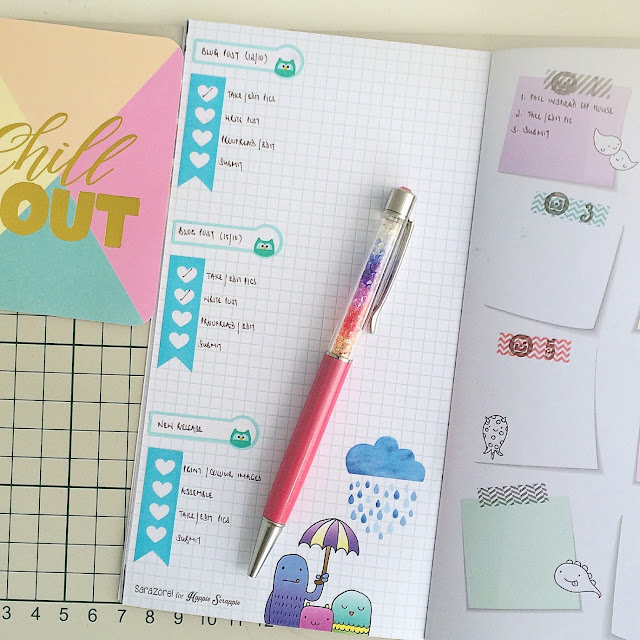
Last but
not least, I used the calendar notepad to track the progress of the
project as it is really important to stay on the schedule. The reason I spread out this simple project throughout the month of November is because I am working in the day and normally I only have time during the weekend, so I won't have need to rush the project. Then, I clipped the piece of notepad to the planner using the magnetic bookmark that came inside the planner kit.

For the
finishing touch, all I needed to do was to punch the inserts and
slot them into The Happy Planner. The main reason of incorporating these inserts into the happy planner is to ensure I will be able to record or to brain dump any
information that I want to add wherever I go.

Okay that's
about all.. Wish me luck for my desk decoration project. I am really excited to
start on it. I am definitely going to make it happen this time.
I will share photos with you guys once it's done!
I hope you
have been inspired by this post on how to use
your Happie Scrappie Inserts.
Till the
next time.
XOXO
Lucy
 |
| Monster Theme A5 Size Inserts |
 |
| Tiny Dots Stickers |
 |
| Monsters and Header Stickers |
 |
| Monsters Magnetic Bookmark |
 |
| Monster Undated Calendar Notepads |