Showing posts with label Tutorials. Show all posts

Tuesday, January 27, 2015

Planners | Page Marker To Hold Your Washi Samplers


 Hello everyone! I am sooooooo in love with Cocoa Daisy Day Planner February kit! There are so many little hearts sprinkle all over the the page inserts and embellishments. Before I show you how I make retractable washi samples page marker (with a short video tutorial), I would like to show you more pictures of the Daisy Day Planner kit. How can you not love them? It is full of hearts and pinks / reds - my favourite colours.


Close up of the page marker - using the cute envelope stamp and also cute heart-lock charm.


As usual, I love the quotes on the monthly page - and especially when it is in cute calligraphy <3
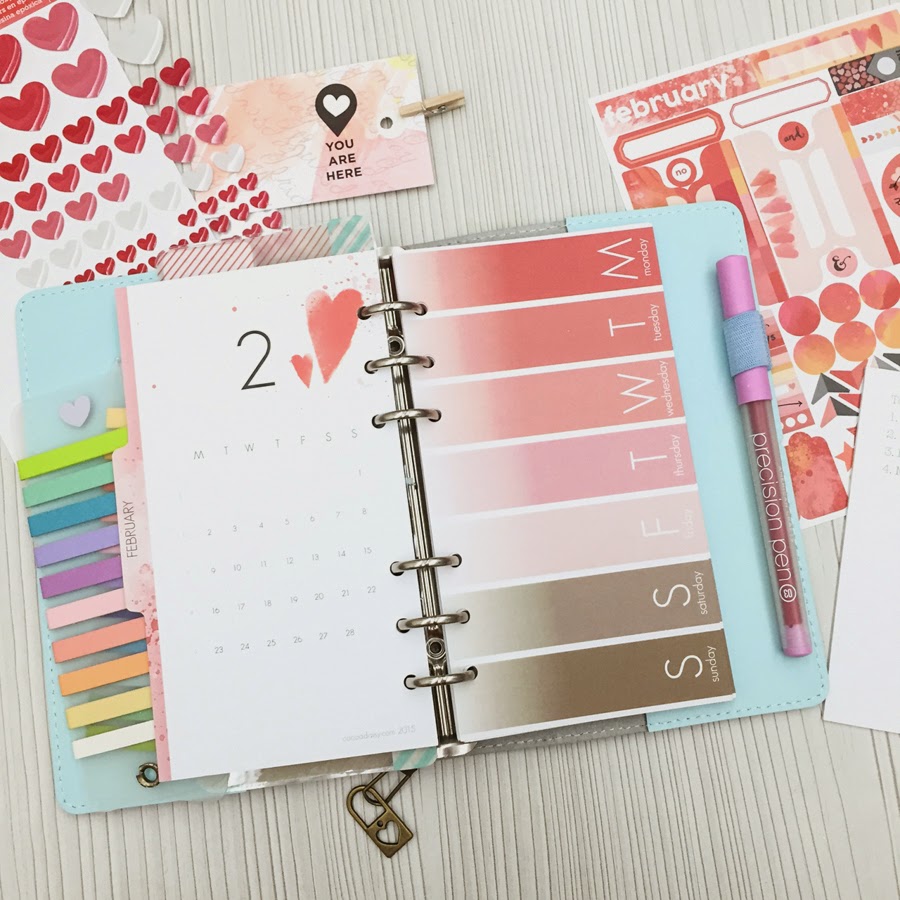

The Week-on-one-page for the february kit.


 And my favourite week-on-two-page which I can't get enough of. I am using this inserts to journal my daily and I can't wait to show you more of these.

And here's a simple video tutorial on how I make a page marker - to store my washi sampler. I hope you like it!


Thanks for dropping by today and have an awesome day ahead!

This video shows you how I combine my love for a planner page marker and washi tapes sampler. I dream up the concept of this page marker (literally dream of how to making this when my 20-month-old kick me in his sleep) - inspired by the old-school  retractable / folding ruler that my dad use when I was really young. 

All you need is washi tapes roll on a piece of transparency / acetate sheet, cropadile and a page marker to make this. Remember to roll the washi tapes sample on your acetate sheets first before fixing it onto the page marker.

Related blog post: 

What I used: 
Washi Tapes: MT Slim 20
Stamps: Cocoa Daisy
Inks: Versafine Onyx Black
Camera (for Video): iPhone 6

XoXo,
Sam

Wednesday, September 3, 2014

Altered Projects | A Peek Into My Fauxdori / Happiedori As Travel Journal


Hello there, as mentioned in the previous post, I have uploaded a video, walk you through how I made my Happiedori (Fauxdori / Midori-inspired traveler's notebook). And this post, I would like to show you some of the pages in my Shanghai traveler's notebook.

Here's the video and remember to leave me a comment / give me a thumbs-up! That would mean a lot to me for making more and more videos.


Here's a pic of my travel essentials:


1. Midori Traveler's Notebook /Fauxdori / Happiedori 
2. Freckled Fawn pouch + Oh Deer Me kit
3. Pens (I used Pilot Coleto & Uni Style-fit here)
4. Fujifilm Instax Share printer (which can print iPhone photo wi-fi) (Related blog post on how to edit your Instax photo)
5. M&M's (I can't travel without these!)
6. Washi tapes - I use them to decorate my journal, seal my M&M's bag, paste receipts to my journal etc. Sky is the limit when it comes to how to use Washi tapes.
7. Stickers

I also love how the Frecked Fawn Oh Deer Me kit August pouch actually match the neon yellow Happiedori.


I added a love charm that I got from a gift shop in Shanghai.


First page: Travel Itinerary and self made pockets with Project Life cards. And also love the colourful rainbow tabs.


Things to pack / bring:


Daily Itinerary which I stamp the list using this Freckled Fawn stamp sets.


The rest are some of the daily pages that I added my journaling, instax photos, memorabilia, train tickets  etc. I do it in a Smashbook way and just journal down my thoughts on how I feel about the places, weather, food and people. I like that I actually did most of my journalling on the spot (right in the restaurant, on the train or in the hotel at night) so I could remember and jot down my thoughts immediately.


Met my Instagram friend @abshanghai (Arlyna) in Plaza 66, Shanghai. The Dining Room is such a cute restaurant with yummy Shanghai food!


We went to The Dining Room 3 times just because my hubs loves the food there! I ran out of Instax film so I drew the food here. The blank inserts from midori (not the water-colour paper type) actually holds the water-colour painting quite well!


I initially bought Malaysia Airlines air tickets to Shanghai but decided to asked for a full refined because of the tragedy that happened to MAS recently. So we switch to Thai Airways and transit at Bangkok to meet my Instagram bestie - Golf. So glad that I got to meet her just a day before she gave birth!


She brought me to a Thai Cuisine for lunch and a cute cafe called Mr Jones for some pastries and tea.


In love with creative lettering recently and considering taking an online class to work on it. Just wish I would have more time to do more things creative. I haven't been creative or crafting much lately and that makes me sad :(


And this is a pic showing the side tabs. I added diary stickers to the side tabs to prettify them. They are really pretty, aren't they?


XoXo,
sam-sig

Tuesday, September 2, 2014

Altered Projects | Fauxdori for My Shanghai Trip *Freckled Fawn*

Hello there,  I am sure some of you knew that I have just joined Freckled Fawn creative team in August onwards. I am so so so thrilled and can't believe I got picked to join this amazing team. When I got my happie mail from Freckled Fawn this month, I wanted to use it to set up my new Filofax Calipso in Bright Blue.


Here's a few photos of the super cute August kit. I know I am late posting this up, but sharing is caring right? I just love the cute transparent stickers that I could use it in my planner or journals!


>>>>>>> Warning: This is a photo-heavy post!! <<<<<<

Then I changed my plan on how I want to use the August kit. I decided to make a Fauxdori / HappieDori (Happie Scrappie's version of fauxdori) and use it for my Shanghai Trip in end of August. (was meant to post this blog post before I left for my trip, but never mind ;))


Some of the goodies that I plan to bring with me so that I could do some journaling during the trip.
1. Tape glue and washi tapes are travel necessity. Even my hubs agrees.
2. Weather & Travel themed Stickers that I made myself using the JuneJuly stamp set. I stamped them on white label stickers and cut them out.
3. Papers clips, stickers and some Project Life cards as embellishments.
4. Was thinking if I should bring s roller stamps with me. But stamping while I travel is so messy.
5. Pens pens pens >> Even picking the right pens would be a tough decision ;P


Then I slot in some PL cards into a sticky pocket (available in my shop) and also some random Freckled Fawn goodies into the PVC zipper pockets from Midori.


Here's the cover page that I embellished using goodies in the Oh Deer Me kit. I especially love how cute the fabric tag that says Adventure Time and also the Foam Alpha-stickers.


I also divided my journal book into 3 sections - using Martha Stewart tabs and decorate it with the transparent stickers in Oh Deer Me kit.


Inside of the cover: I machine stitched two sides of 2 PL cards. Then glue it down to the kraft cover to use it as pockets to keep receipts and what-nots. 
First page of the journal: my travel itinerary / flight details.


This page is a notepad from Target that my friend, Evelin sent to me. I used it to write down things that I need to pack. 


Using the stamp set in August kit here, to list down things / presents that I needed to pack for my Instagram bestie - Golf.

I used the July stamp set (travel-themed) to make my own list for things to be completed before I leave + my travel itinerary.


P.s.: I have completed the travel journal and also filmed a video to show you guys. will make another blog post showing the updated photos soon! Stay tuned ;)

XoXo,
sam-sig