Showing posts with label amigurumi. Show all posts

Tuesday, March 4, 2014

Tutorial⎪Pudding Amigurumi Pattern


Hello all, remember I was writing amigurumi crochet pattern for this cute little pudding 3 weeks ago? It took me a few days + trials just to get things right. Just because it's been a while since I wrote crochet pattern. I have caught the crochet bug again recently and have been making amigurumi + have been really blessed to have conducted a few amigurumi workshops. Thanks to all the girls who have attended my workshop and so glad to get you all HOOKED too! I know some of the girls even ditch scrapping and went for full-time crocheting. LOL.


I don't have a pattern tester, so I keep making the same puddings again and again (with different flavours, Yum!) to make sure I get things right. So there you go! I have made a blueberry pudding, creme brûlée and a strawberry pudding.  Strawberry has the cutest expression I would say ;)


And let's start making pudding ;)


Materials:


  • Acrylic and cotton yarn (both are perfect for making amigurumis) - In at least two colours, light purple and cream, brown and light yellow, pale pink and cream etc. You can use any combination to make different flavours for your pudding
  • Stuff of your choice (I normally prefer polyfill) You could use poly-pellets to weigh it down and use it as pin cushion or paper weight too
  • One pair of black beads / plastic eyes (size of your choice)
  • Black embroidery floss for stitching the eye & smiley face, a tiny bit of pink yarn as blusher
Tools:
  • Crochet hook size E (or any crochet hooks suitable for the yarn you use)
  • Tapestry needle & Sewing needle for yarn


Abbreviation:
R = Round
ch = chain
sc = single crochet

dc = double crochet
st = stitch
inc = increase (2sc in a stitch)
dec = decrease (2sc off together)
sl st = slip stitch(es)
* = repeat directions between * and * as many as indicated
() = number of stitches in each round


NOTES:
1) Work in continuous spiral round; do not join rounds unless otherwise stated. Mark first stitch of each round.
2) To change color, work last st of old color to last yarn over. Yarn over with new color and draw through all loops on hook to complete st.


Pudding (Top)
Start with dark brown colour (colour of the top of the pudding); make adjustable ring / magic ring
R1
Magic ring, sc 8 in a circle (8)
R2: *inc 1*, repeat 8 times (16) 
R3: *sc 1, inc 1*, repeat 8 times (24)
R4: *sc 3, inc 1*, repeat 6 times (30)
R5: *sc 4, inc 1*, repeat 6 times (36) 
R6:  
1sc back loop only in each stitch (36)


Change to light yellow colour R7 - R81 sc in each stitch (36)
R9*5sc, inc 1*, repeat 6 times (42) 
R10 - R121 sc in each stitch (42)
R13*6sc, inc 1*, repeat 6 times (48) 

Fasten off & leave a long tail for sewing.

Pudding (Base)
Start with light yellow colour; make adjustable ring / magic ring

R1Magic ring, sc 8 in a circle (8)
R2: *inc 1*, repeat 8 times (16)
R3: *sc 1, inc 1*, repeat 8 times (24)
R4: *sc 3, inc 1*, repeat 6 times (30)
R5: *sc 4, inc 1*, repeat 6 times (36) 
R6:
*sc 5, inc 1*, repeat 6 times (42) 

R7: *sc 6, inc 1*, repeat 6 times (48) 

Just in case you would prefer to crochet-along with some photo tutorials:


R1: Start with the yarn (top of pudding), Magic ring, 8sc


R2: inc in every SC. remember to put your stitch marker at your first stitch of Round 2


R3: SC in first stitch, then inc in the next stitch, repeat 8 times. 


This picture is showing you to pull yarn over both loops. When pattern does not indicate, we normally pull yarn over BOTH loops (as pictured) in making amigurumi


R6: SC in each stitch, but only pull yarn over back loop only

Once you are done with R6, it should look like this, with a circle line
And now you have to change colour to the colour of the pudding base. place the hook inside the two bunny ears (as pictured)


Before you complete the last SC of R6, change to new colour and pull yarn over the two bunny ears. Continue to crochet by following the pattern: 
R7: SC all around (remember its both loops!)
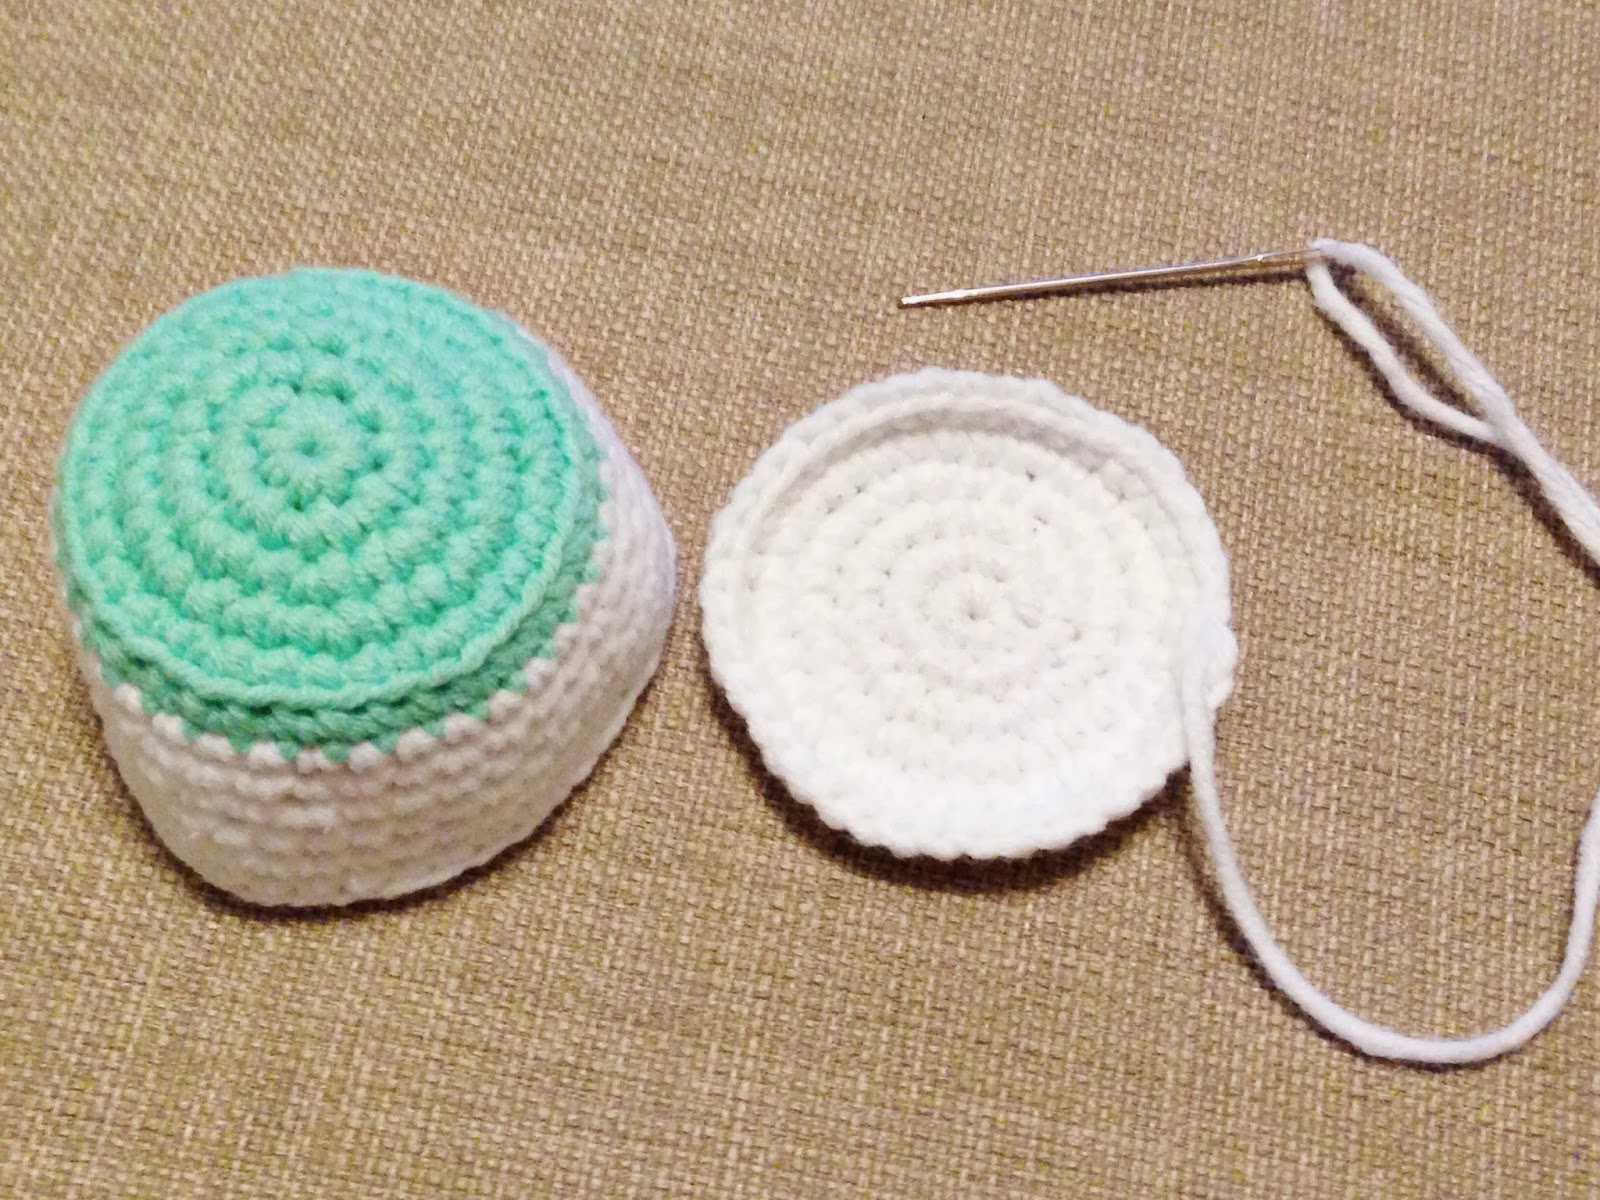

To stitch the base and the top together:
fasten off both pieces and leave long tail for either the top of the base of the pudding. 

To stitch them neatly, just match each SC, stitch with yarn of the same colour. I am using green yarn here so that you could see clearly how I stitch two pieces together. Easy Peasy!


Insert polyfil when you have stitch 2/3 of the base. And continue stitching the remaining SC, then cut the excess yarn. Stitch the eyes and add fun expression >_<

Heart Applique


Start with ch 6,
then SC in the second ch from hook,
SC 3 tog, 
in the same ch —> SC, 5 DC,
DC,
in the same ch —> 2DC, ch, 2DC,
DC,
in the same ch —> 6 DC, slip stitch and fasten off

For some of the stitches, refer here for tutorial:
DC - Double crochet (here, and here)
SC 3 Tog - Single Crochet 3 together (i.e. decrease 2 stitches) (here)

Happy crocheting!

Remember to hashtag #happiescrappie & tag me @happiescrappie on instagram when you make something out of my pattern ;)

sam-sig

Friday, January 31, 2014

Altered Projects⎪Inspirational Tags and Amigurumi Workshop

Happy Chinese New Year everyone! Today is first day of Chinese NEw Year - And I am pretty excited because this year is gonna be Ivan's first new year going around collecting red packets. I took this photo of pretty Chinese New Year decor at a shopping mall last week. So pretty eh?

image

Today I am sharing a few tags that I made under 30 minutes on Craftwell blog. I love packing happy mails and add tags to my packaging. I diecuts  plenty of alphabets, doilies and shapes one night and keep them in a mini paper suitcase. So when I want to create something, these die cuts come in really handy when I do layering on my projects.


If you have been following my posts or projects, my favourite dies are probably the doilies and hearts. In these two tags, I added heart doilies to the tag. I always like to die cut a bunch of shapes using white cardstock. If I need it in other colors, I would probably mist it or color it with watercolor. And you will never go wrong with white color too!

image

For these two tags, I added doilies, ampersand, key and lock die cut that I cut with My Favourite Things die-namics. I love how quick eBosser would die cut a bunch of shapes with its huge platform. I fit like 4 sets of dies (included 2 sets of alphabet dies from A to Z) in one A4 size platform. Just in case you are wondering, the quotes on the tags are typed with one of my vintage typewriter – Royal Future. Love love love the type face and if you squint your eyes, these typewriter has really unique ‘e’.

image

Do you make tags? I hope this post would inspire you to make some tags with your scraps and die cuts.

And here's a peek of my Vintage tappy - Royal Futura. Love the dropped 'e' and I had a hard time deciding whether I should sell it!
image

Supplies Used:
Papers – Basic Grey, American Crafts, Studio Calico
Embellishments – Basic Grey
Dies – My Favourtie Things Die-namics
Others – Vintage Typewriter, twine, tine attacher, Mister Huey

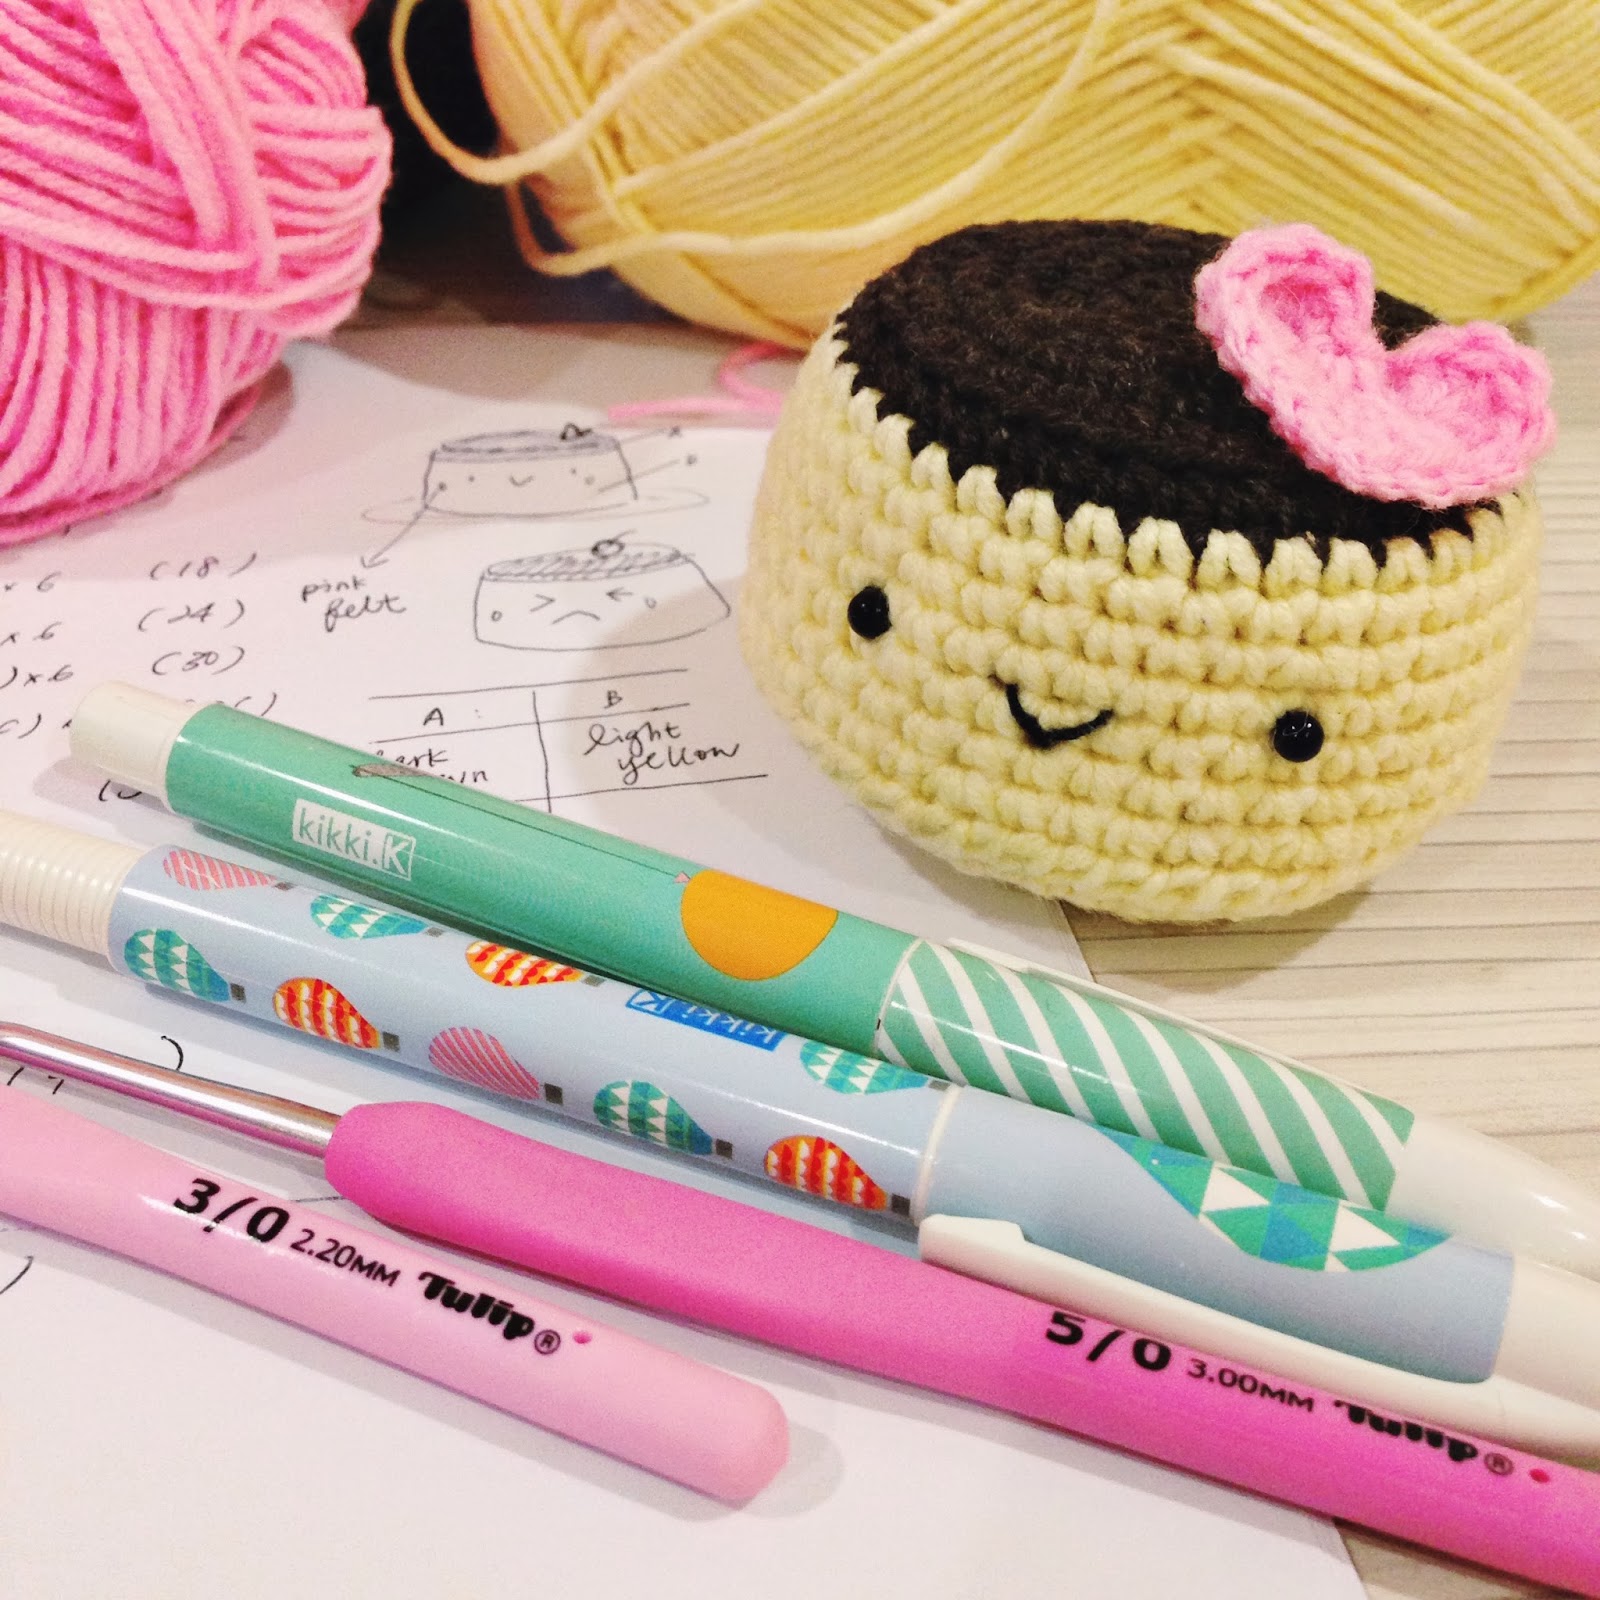
Another updates: I am also conducting crochet amigurumi workshop recently. Here's a peek of my tools and also dolls that you can learn to make in my class. Yes, I am kinda obsessed with crochet hooks - I have total 4 sets and I wish I could crochet as much as possible. Crochet is very therapeutic and I enjoy watching youtube (Chinese match making show to be exact ;P) while crocheting.

image

Here's one of the doll (Pom Pom Purin) you could learn to make in my amigurumi class in Kuala Lumpur (Malaysia) & Singapore. Huge huge thanks to Mei from Amigurumei for sharing her patterns on her blog generously. Also huge thanks to her for allowing me to use her patterns in my class.

image

The dolls that you could make in my amigurumi workshop ranging from beginner, intermediate and advanced class. Even beginners who have no crochet skills could learn the basic chains, slip stitch, single crochet and making magic ring and a lot of crochet stitches + knowledge for making you own amigurumi. I would also teach you to read Japanese and US patterns. For more info: email: shop.happiescrappie@gmail.com

image

XoXo

sam-sig


Wednesday, September 26, 2012

Meow In Da House (Amineko)

This is the ta-dah moment that I can't wait to share with you all!

It's huge, isn't it?


Mr Meow loves my doggie Popcorn

Whoopsie... gotcha!

Mr Meow took up the whole bed here

The hamster, the meow and the dog get-together >_<

Been thinking of making this amineko ever since i started crocheting few years back but I am never persevere to complete a huge project like this. Love this cat to bits and it totally worth my 4 days of handwork + 7 skein of 100g yarn for this awesome meow~ using J hook (the largest hook size I have) and three bags of polyfil, small pebbles (to weigh the buttock and limbs down) lead to a 3ft tall amineko meow.  I have yet to name the meow yet... Any ideas? My mum suggested me to do this huge meow again in PINK and make them a couple. I guess I would need to stop crochet-ing thick yarn for a while as it really hurts my wrist! It's time to get back to my granny square blanket. 

p/s: I use the original super huge Amineko crochet pattern form this japanese website.

❤ XoXo 

Monday, September 24, 2012

Toothpaste?

Guess what we have here?

Toothpaste with minty flavor?

The good ol' Colgate?

Noooo! You are wrong! They are watercolor in tube!

Watercolor in red

Oh no... Someone left the cap off >_<

And these two are my watercolor paintings for my previous children book illustration class at NAFA.
An apple dog inspired by the famous Pandapple
Watercolor painting is not so difficult after all and it helps relaxing =)

Another drawing inspired by my teacher. I love how the little doggie turned out. We didn't use watercolor during our first class, he taught us paint using batik paint and also food coloring which gives a slightly more vibrant effect than the watercoloring.

More crochet & amigurumi projects will be posted soon! XoXo =)

Tuesday, September 11, 2012

Amigurumi Pattern: Baby Seal Learns Swimming

I got this pattern from Luvly-gurumi's Etsy shop. I am addicted to all her cutesy amigurumi patterns now and I want 'em all! I do not know the difference between seal and sea otter. I have googled some pictures of the seals and sea otters here. Both are equally cute despite difference in sizes.

There was once I watched an sea otter learnt how to eat urchin on NatGeo. Too cute! 
Photo credit: ZME Science

The teary eyed baby seal.
Photo Credit: Whale Images

The not-so-cute leopard seal / sea leopard
Photo Credit: Open Water Pedia

And this is my version of baby seal 

Baby seal learns swimming

With a bucketful of fish.Yummmm!

Hello! Are you a seal too?

I can do backstroke too!

Baby seal just loves his float & fish  

P/s: The pattern for the baby seal is purchased from Luvly-gurumi. I only created the swimming float and bucket on my own.

Here's the pattern of the float and bucket. No worries, the float isn't as intimidating as it looks. It's pretty easy-peasy and I love love love the color combination here.

NOTES:
1) Work in continuous spiral round; do not join rounds unless otherwise stated. Mark first stitch of each round.
2) To change color, work last st of old color to last yarn over. Yarn over with new color and draw through all loops on hook to complete st. 

Float x 1 (blue & white colour)
Start with white color; Chain 48 (loosely) and sl st
R1: *sc 6 <white>, sc 6 <blue>*, repeat 4 times (48)
R2*(sc 2, inc 1, sc 2, inc 1) <white>, (
sc 2, inc 1, sc 2, inc 1) <blue>*, repeat 4 times (64)
R3*(sc 3, inc 1, sc 3, inc 1) <white>, (sc 3, inc 1, sc 3, inc 1) <blue>*, repeat 4 times (80)
R4 - R6: *sc 10 <white>, sc 10 <blue>*, repeat 4 times (80)
R7: *(sc 3, dec 1, sc 3, dec 1) <white>, (
sc 3, dec 1, sc 3, dec 1) <blue>*, repeat 4 times (64)
R8: *(sc 2, dec 1, sc 2, dec 1) <white>, (sc 2, dec 1, sc 2, dec 1) <blue>*, repeat 4 times (48)
R9 - R10*sc 6 <white>, sc 6 <blue>*, repeat 4 times (48)
Fasten off, leaving both blue and white tails for sewing. Sew R1 & R10 together.

Bucket x 1 (Grey)
Start with grey color; make adjustable rings
R1: 8 sc in rings (8)
R2: inc 8 (16)
R3: *sc 1, inc 1*, repeat 8 times (24)
R4
1 sc in each stitch (back loop only) (24)
R5 - R8
1 sc in each stitch (24)
R9: *sc 5, inc 1*, repeat 4 times (28)
R10 - R13
1 sc in each stitch (28)
Fasten off and sew the end.

Handle for the bucket x 1 (White)
Start with white color, chain 20, sew both ends to the bucket.

Cut some felt fish to fill up the bucket and you're done! Told ya the accessories for the baby seal are super-duper easy to make right? 

Monday, September 10, 2012

Moshi Moshi

I haven't been scrapping at all lately, been addicted to crocheting again after ages. Been really sick recently and haven't been going for shopping for weeks. After crochet-ing days and nights, my amigurumi dolls been popping out everywhere in my room now.

Its been raining and raining recently. And this cute mushroom just popped up on my craft table.

Mushroom says hello to the new owner! I made this for a crafty friend whose birthday is coming up real soon. I hope the mushroom will make her day & brighten an usual craft table.

Insert a used water bottle to make it sturdier. Perfect for keeping paper clips and mini junks.

Tuesday, August 28, 2012

Amigurumi Pattern: Penny The Penguin

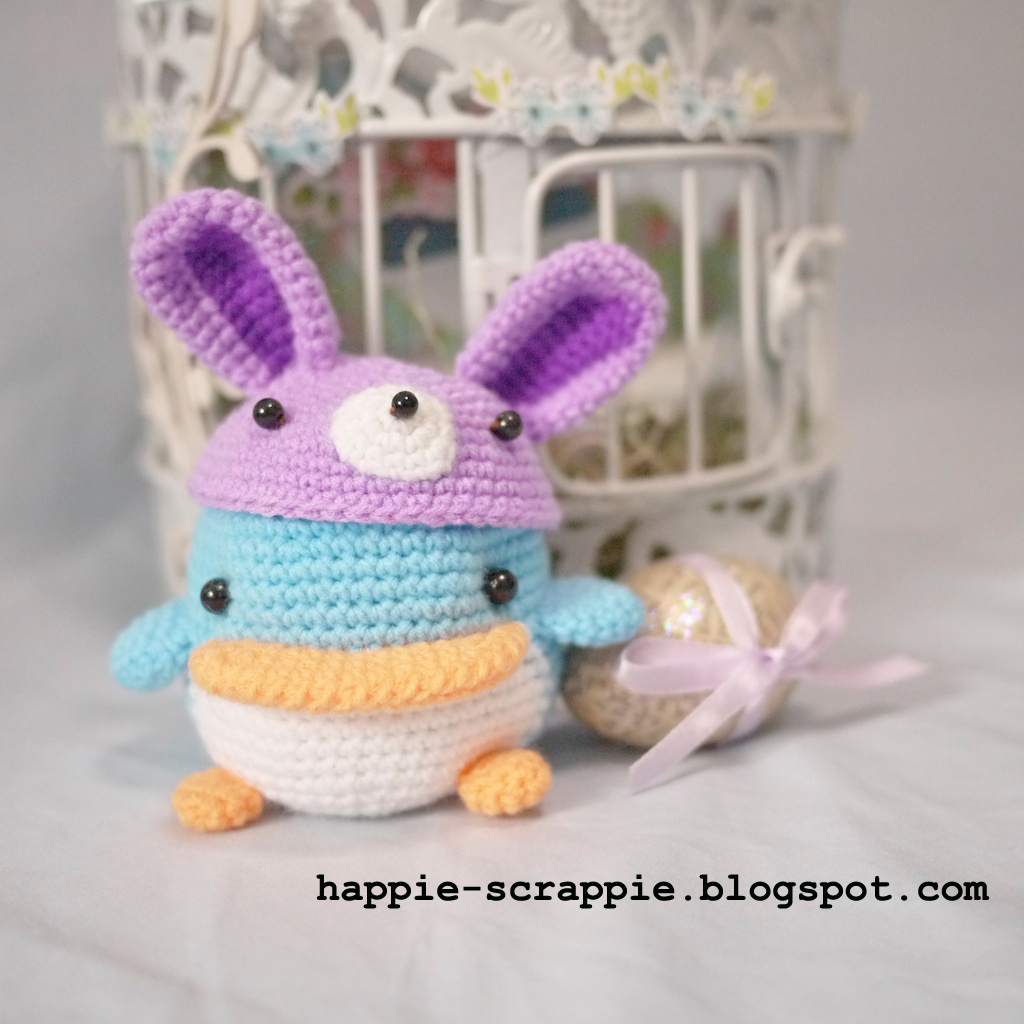
Hello, I am Penny the penguin who enjoy sunbathing with my bunny-eared hat =)

The purple bunny hat fits her just nice

Penny the penguin can be an Easter bunny too!

And this is Penny being herself, without the cute hat. 


This is a free amigurumi pattern that I have shared on my Etsy listing ages ago. Decided to post it over here so that I do not have to keep re-list the free pattern.


Materials:
  • Acrylic yarn - White (turquoise or blue, white, pale yellow or orange, grey)
  • Stuff of your choice (I normally prefer polyfill)
  • One pair of black beads / plastic eyes (size of your choice)
  • Black embroidery floss (for attaching the black beads as eyes)


Tools:

  • Crochet hook size C (or any crochet hooks suitable for the yarn you use)
  • Tapestry needle & Sewing needle for yarn


Finished Size: 
Approximately 11cm tall. (I use a Clover size C crochet hook.)
*Your finished doll might finish in bigger or smaller than mine depending on your tension and
the yarn you use.*

Abbreviation:
R = Round
ch = chain
sc = single crochet
st = stitch
inc = increase (2sc in a stitch)
dec = decrease (2sc off together)
sl st = slip stitch(es)
* = repeat directions between * and * as many as indicated
() = number of stitches in each round

NOTES:
1) Work in continuous spiral round; do not join rounds unless otherwise stated. Mark first stitch of each round.
2) To change color, work last st of old color to last yarn over. Yarn over with new color and draw through all loops on hook to complete st. 

Penguin x 1 (blue & white colour)
Start with blue color; make adjustable rings
R1: 6 sc in rings (6)
R2: inc 6 (12)
R3: *sc 1, inc 1*, repeat 6 times (18)
R4: *sc 2, inc 1*, repeat 6 times (24)
R5: *sc 3, inc 1*, repeat 6 times (30)
R6: *sc 4, inc 1*, repeat 6 times (36)
R7: *sc 5, inc 1*, repeat 6 times (42)
R8: 1 sc in each stitch (42)
R9: *sc 6, inc 1*, repeat 6 times (48)
R10: 1 sc in each stitch (48)
R11: *sc 7, inc 1*, repeat 6 times (54)
R12 - R15: 1 sc in each stitch (54) 

Everything is in blue from R1 to R15. You need to change colour for the remaining rounds.
R16: sc 18 (blue), sc 18 (white), sc 18 (blue) (54)
R17: sc 17 (blue), sc 20 (white), sc 17 (blue) (54)
R18 - R22: sc 16 (blue), <sc 22 (white)>, sc 16 (blue) (54)
R23: <dec 1,sc 7, dec 1, sc 5> (blue), <sc 2, dec 1, sc 7, dec 1, sc 9> (white), <sc 1, dec 1, sc 4, dec 1, sc 7> (blue)(48)
R24: <sc3, dec 1, sc 6, dec 1, sc 2> (blue), <sc 4, dec 1, sc 6, dec 1, sc 5> (white), <sc 1, dec 1, sc 6, dec 1, sc 3> (blue) (42) 
R25: <dec 1, sc 5, dec 1, sc 5> (blue), <dec 1, sc 5, dec 1, sc 7> (white), <sc 2, dec 1, sc 1, dec 1, sc 5> (blue) (36)
R26: <sc 3, dec 1, sc 4, dec 1, sc 1> (blue), <sc 3, dec 1, sc 4, dec 1, sc 3> (white), <sc 1, dec 1, sc4, dec 1, sc 1> (blue) (30)
R27: <dec 1, sc 3, dec 1, sc 3> (blue), <dec 1, sc 3, dec 1, sc 3, dec 1> (white), <sc 3, dec 1, sc 3> (blue) (24)

Change to white:
R28: *sc 2, dec 1*, repeat 6 times (18)
R29: *sc 1, dec 1*, repeat 6 times (12) <start stuffing polyfill>
R30: *dec 1*, repeat 6 times (6)

Close with sl st, leaving a long tail for sewing. Weave tail through last round and gather tightly. Knot to secure. 

Edit: 21/12/2012 - There is slight error in R2 which i amend it. Will post up either photo tutorial / video soon! thanks! Beak: (orange color)
We are going to crochet an oval and fold into half before sew & attach it to the body of penguin. Click here for the extra helpful video tutorial about how to crochet an oval. (Note: the number of sc in my pattern & the video tutorial is different)
Start with orange color, make 11 ch, (last chain is a 'turning chain' which will not be worked into later)
R1: sc 9, inc 2, sc 8, inc 1, sl st (22)
R2: Ch 1, inc 1, sc 8, inc 5, sc 8, inc 3, sl st (28)
R3: Ch 1, inc 1, sc 9, inc 1, sc 1, inc 1, sc 1, inc 1, sc 9, inc 1, sc 1, inc 1, sc 1, sl st (34)
R4: Ch 1, inc 1, sc 10, inc 1, sc 2, inc 1, sc 2, inc 1, sc 10, inc 1, sc 2, inc 1, sc 2, sl st (40) 


Fasten off & leave a long tail for sewing. Remember to fold into half before sewing & attach it to the R15 of the penguin.


** Alternatively, if you are still clueless on how to crochet an oval, you could try this pattern for making the beak.
Start with orange yarn, make adjustable rings
R1: 6 sc in rings (6)
R2: inc 6 (12)
R3: *sc 1, inc 1*, repeat 6 times (18)
R4: *sc 2, inc 1*, repeat 6 times (24)
R5: *sc 3, inc 1*, repeat 6 times (30)
Fasten off & leave a long tail for sewing. Remember to fold into half before sewing & attach it to the R15 of the penguin. **

Edit: 21/12/2012 (the pattern for the wings was written wrongly. It's for another penguin that is now shown here. Thanks EV MC for pointing this out =)) Wings: (Make 2, blue colour)
Start with adjustable rings
R1: 6 sc in rings (6)
R2: inc 6 (12)
R3: *sc 3, inc 1*, repeat 3 times (15)
R4: 1 sc in each stitch (15)
R5: 1 sc in each stitch (15)
R6: *sc 3, dec 1*, repeat 3 times (12)
Fasten off & leave a long tail for sewing. Remember to fold into half before sewing & attach it to the R17 on each side of the penguin.

Feet: (Make 2, orange colour)
Start with adjustable rings
R1: 6 sc in rings (6)
R2: *inc 1, sc 1*, repeat 3 times (9)
R3: *inc 1, sc 2*, repeat 3 times (12)
R4: **sc 2, dec 1*, repeat 3 times (9)
R5: *sc 1, dec 1*, repeat 3 times (6)
Fasten off & leave a long tail for sewing.

*Sew all parts together & a pair of platic eyes*

Ta-dah!! You are done!!!

***This is my very first time writing pattern. Feel free to convo me if you are stuck in the middle or you find some error in the pattern***


Do leave me a comment if you like to have the pattern for making the bunny hat =) Happy crocheting!

Update: Click here for the bunny hat pattern =)

** This pattern is for personal use only. Copyright is reserved. You may not use this pattern or doll produced from this pattern for retail or commercial purposes. **