Showing posts with label Planner Kit. Show all posts

Friday, October 2, 2015

All About my Little Monster


Hello again!

Today I’m excited to be showing you the completely adorable monster themed Happie Scrappie planner kit! 
If you know me, you know that I’m a fauxdori girl through and through and so I have the fauxdori kit goodies to show you today.

When Sam was designing the kit and I was designing the Limited Edition Confettidori to go along with it, we had no idea what the other was doing and so it was a very happy accident to see that we chose the same design for the interior of the Confettidori and the cover of the fauxdori insert! I love how completely happy and bright this Confetidori is when I open it!
This month Sam designed some acrylic key chain charms to go with the kits and they were a home run success in my opinion! They feel very expensive and well made, nice and heavy and the designs are so completely cute.  And I LOVE that she decided to add a gold chain to them.  Perfection!  Wish I had one of every design!
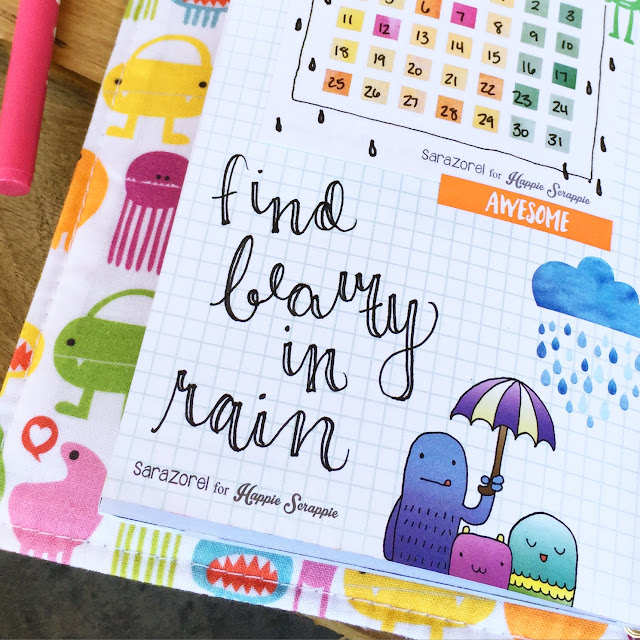
This kit reminds me so much of the little 2-year-old monster in my life so I decided to dedicate my fauxdori insert to my little monster.
This fauxdori insert is absolutely to die for.  It is full of TONS of different styles of pages; listing pages, and coloring pages, and pages with little sticky notes, and pages with big squares to fill in and lined pages and grid pages.  Some of the pages are in color and some are in black and white.  I’m completely obsessed.
 
With so many different styles of pages it makes it easy to add a bit of your own flair and end up with a beautiful page you can be proud of. 
Sometimes when you have a fauxdori insert and all the pages are the same, it can be hard to come up with the creative spark to fill them all, but this insert with all of its random pages makes it so super easy to feel inspired!
I added a sheet from the little undated calendar notepad that came with the kit to track my water intake.  Since this insert will be more for my little monster, I may change that calendar out for one that tracks my daily journaling about him.
Another page in this insert I used for tracking some of the cute things that Wyatt has been saying and doing lately.  He is changing all the time; so I love that I can easily have a place to jot these little things down to help me remember how cute he was at this age! 
 
Thanks so much for reading this post!  I hope you feel inspired to pull out all of the cute bits from the kit and have some fun!! 

I’d love to see what you do with your insert!  Feel free to tag me if you post any pictures of what you create!

Till next time and with lots of love,
Teddi Confetti

Things that I used in this blog post.

Thursday, September 3, 2015

Planner Setup using August Happie Scrappie Planner Kit

Hello everyone, it’s Lucy (@organisedlucy) again on the blog. I cannot wait to share with everyone how I used the goodies from the August Happie Scrappie Planner kit to set up my planner. 

The August Happie Scrappie Planner Kit is my absolute favorite among all the Happie Scrappie Planner Kits that I received previously, as I always have interest in the beauty department even before I started my obsession over papers and stationeries. The August planner kit is definitely jam-packed with so many gorgeous goodies that you can easily personalize and use on your planners. Furthermore, this month’s planner kit is a collaboration between Sam and Sarah Zorel (@sarazorel).

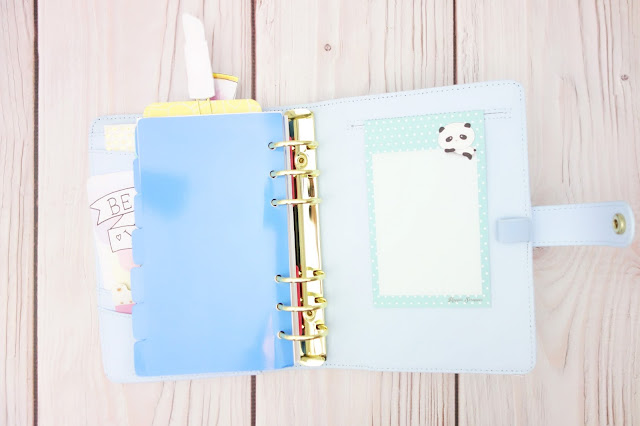
Recently I succumbed myself to the temptation of buying the new Kikki K planner- Icy Blue Perforated Medium Size Planner. It is just too gorgeous. I am sure everyone has seen this planner on instagram, youtube, blogs and Kikki K Website. So when I received my Happie Scrappie Planner kit, I knew right away that I wanted to do a planner setup with Happie Scrappie goodies.


The August Happie Scrappie Planner kit comes with a double sided dashboard, a double sided page marker, twelve pieces of double sided journaling cards, four different designs of planner inserts, a roll of washi tape, one sheet of makeup theme deco stickers, transparent page flags, a pack of sticky notes, a pen, a charm and two Kate Spade paper clips. 


Let’s take a look at the Dashboard. It was printed double sided with two different designs on it. Since I love both designs of the dashboard, I decided to use a Post-It Index Tabs to act as a base to hold the dashboard and the pagemarker and punched holes on the tabs instead of punching holes directly on the dashboard. This is to ensure I will still be able to use the other side of the dashboard. The Index Tabs can be found in most stationery stores. You can apply the same method for the page marker too, as it was printed double sided with two different designs.


I then picked up one of the planner inserts and placed them on top of the dashboard with index tabs adhered on it. The purpose of this was just to ensure the spacing of the holes punched would fit perfectly into the planner's rings. I used the single hole puncher that I got from Kikki K recently. Although the size is rather small, it is in fact very sturdy and I managed to punch holes through the laminated dashboard. 


Next I like to put page flags and sticky notes in my planner pocket, as these stationeries are very functional to me. I normally use them to mark my calendar and my weekly layout. 


Then I moved on to select the journaling cards that I want to put in the planner. I was having a hard time during the selection process. The watercolor painted by Sam really complemented the illustration drawn by Sarah so much that I just could not take my eyes off the journaling cards. They are just too captivating! At the end I decided to pick the one with the banner on it that has the words “BE YOU TIFUL”. Instead of the usual display of the journaling card in a planner, I decided to add a cut out image from one of the journaling cards and clipped it to the other journaling card. 


Of course this setup would not be complete without a collection of washi tapes. They come in handy when I need to stick a notepad on the inserts or just for decorative purposes. I picked up an old business card and used it as the washi tapes holder. 


I also added my favorite stickers from Happie Scrappie such as the small dots, the happy mails & the fox critters stickers and the makeup stickers from June, July and August planner kits respectively into the largest pocket in the planner.


Since I purchased extra sets of the journaling cards (I may need more now), I decided to create DIY paper clips using some of the images from the journaling cards. 

Things that you will need to create the DIY paper clips are a piece of cardstock, paper clips, journaling cards, a pair of scissors, beacon glue, a laminator and a laminating pouch.


I started with cutting the images that I wanted from the journaling cards. Then I made a copy of the similar shape on the cardstock and cut them (this is to make sure I have sturdy paperclips). Next, I put them into the laminating sheet and ran it through the laminator. Finally I cut the laminated images and glued them to the paper clips using the beacon glue.

The processes are quite simple. You can find a youtube video by Lisa Pullano on how to do a DIY paperclips or you can find the tutorial on Sam's blog - link below.

http://happie-scrappie.blogspot.sg/2015/04/planners-from-scrapbooking-goodies-to.html


Lastly I added the Happie Scrappie Notepad to the back of the planner.


That’s about it! Now I have a newly setup planner with Happie Scrappie Goodies in it.


I hope you got an useful tip or two from this entry on how to use the Happie Scrappie Goodies.
See you next time.
Happie Planning everyone! 

FYI Happie Scrappie has its own Facebook Group now, do join the fun - link below :)
https://www.facebook.com/groups/439566509577989/

XOXO

Lucy


Tiny Dots Stickers


Friday, August 28, 2015

Utilizing Happie Scrappie Planner Kit on Erin Condren Life Planner


Hi everyone! I’m Cindy Guentert-Baldo (@llamaletters on Instagram and Cindy Guentert on Youtube) and I am so excited to have been asked to write a guest post for Happie Scrappie today. I’ve been a fan girl of hers for nearly a year now – her Happie Planner kit is one of my favorite packages to get in the mail each month!

Because I’m such a fan, I tend to talk about her kits a lot on Facebook and Instagram, and when I talk about them, I tend to get lots of questions. See, even though I receive the Personal size kit from Sam every month, my main planner is an Erin Condren horizontal layout. This means that a lot of the planner girls I interact with tend to also have spiral bound planners rather than binder style, and since the kits I receive are geared towards the Filofax/Kate Spade/etc crew, I often find myself explaining to the spiral bound crowd why I love the Happie Scrappie kits so much. So, rather than showing a layout with all of the Happie Scrappie stuff everywhere, I decided to show some of the ways I incorporate the items in the kit into my every day spiral planning.

After all, Sam’s stuff is so cute it should be used in every style of planner, ring bound, spiral bound, or otherwise!

One of the items that is almost always included is a set of adorable page flags or sticky markers. I love these. They are probably the most used accessory for me, not just in my planner, but in my everyday life. One of my favorite uses for them is marking events ahead of time so that, in case times change, I don’t have to do some fancy covering with washi tape or big old scribbles to cover it up! The hedgehogs from this month’s kit are especially adorable, so much so that I had to hide them from my 11 year old so she wouldn’t run off with them!


I’ve been loving the stickers Sam has been designing for the kits lately – I tend to use functional rather than decorative stickers in my planning and it is always a treat to have such happy colors to go with the function. Most days I put the top two “to do” items for that day under the date on my layout, and the envelope stickers from this month fit perfectly and match the colors so beautifully.


Generally my monthly layout is pretty boring. I use it to keep track of appointments and meetings, but I don’t spend a lot of time making it look fancy… Until this month! I stamped on the fox labels from this month’s kit with chalk ink and stamps from the studio L2e “list it” kit and put them in my sidebar to make a list of priorities for the month. I also couldn’t help but add a little decoration with the fox quote cards and owl stickers from August, as well as the polka dot washi from a previous kit. It’s still not super fancy, but it is waaaay more decorated than usual.


I’ve been struggling to decide what to do with the monthly note pages in my new Erin Condren… I was super excited to have them as a feature, but now that I have them I keep drawing a blank. (Of course.) The little labels Sam did for this month’s kit inspired me (side note: KEEP MAKING THESE I LOVE THEM) to create a list for my Konmari project I am starting up next month. I stamped using black ink with the studio l2e stamps and added dots from the previous month’s Happie Scrappie kits to serve as check boxes. I also used one of the gel stick highlighters from Sam’s shop to add some color to my lettering – these highlighters don’t bleed, blend with water and work to add really cool effects. I love them. I also can’t speak highly enough of the pens Sam sends in her kits. The fine point and gel ink always write so well, I hoard these pens and save them for special occasions!

I guess the hoarding is another sign I need to Konmari. ;-) (If you don’t know what it is, check out the book The Life Changing Magic of Tidying Up by Marie Kondo.)


For the next couple of months I need to track work hours. In the past, I have used a coil clip to add a journaling card into my planner for this purpose. This month, though, the die cut animal cards from the kit were way too cute to not use for this. Plus, the ears work as a great bookmark! I added a flag (with a dollar bill stamp from Tiny Stamps Big Plans) and one of the doodle stickers from this month to jazz it up. I also used one of the big sticky notes to hide my info from all of you stalkers out there. (Don’t think I don’t notice you looking! I’m kidding, I’m kidding.)


These aren’t the only ways I’ve used Happie Planner kit items in my Erin Condren, just some of the most recent ones. Believe me, her kit is so worth the (very reasonable) price every month, even if you don’t use a binder system. If you don’t use one at all I might recommend the Traveler’s Notebook insert kit, since those inserts function just fine as a little notebook.

I, however, actually do use a personal size Color Crush planner for challenges, so I do have a use for the fabulous inserts Sam sends. The paper… I can’t go on enough about the paper. It is so thick and luxurious, it is nearly cardstock. Sam’s paper is a lettering girl’s dream. That’s why I’ve used the inserts in the past as a base for my #listersgottalist challenge. The inserts and panda stickers here came from a previous kit, while the page reinforcers come from Sam’s shop. I just love her inserts, and each month the style is different (this month’s kit was week on one page and a blank page, and I haven’t quite decided how to use those yet) but the paper is always wonderful. Did I mention I love the paper??


I hope I have given you some ideas on how to use the items from the Happie Planner kit even if you don’t do the ring binder style. And thanks Sam (and Lucy) for inviting me to the blog today… Happie Planning!


Pastel Polka Dots Washi Tape
Sticky Notes

Gel Stick Highlighters