Showing posts with label DIY Planner Ideas. Show all posts

Monday, May 18, 2015

Planners | From Project Life Pockets to Planner Storage

Hello hello there! Today I am gonna share a simple post on how I use the pocket sleeves from Simple Stories in one of my A5 sized planner to store my Shop Evalicious goodies (like stickers, journaling cards and paper clips).


Sorry for the glare but this is the best photo i could get to show you a rough idea how the plastic sleeve (in 6x8 size) would look like in a Kikki K Large planner. In general, Kikki K large planner (which is equivalent to Filofax A5 size) is slightly wider, thus I did not trim down the sides of the sleeves as they just fit nicely.


And now, let's get started to turn this Project Life sleeves into planner pockets. All you need is a single hole punch and 6x8 plastic sleeve ( mine are from Simple Stories and i love love love their quality)


I just use one of the A5 size insert to determine where the holes should go. The original 2 holes on the sleeves actually match up with the 2nd and 5th holes of my 6-ring binder.


And here's how the sleeves look like in my A5 sized planner. Nothing is peeking out but when you close the binder, the sleeve might touch the elastic pen loop a little bit but it doesn't bother me at all as I don't really keep my pen there.


For this page, I actually fill up all the pockets with planner stickers. I actually use a paperclip from Shop Evalicious to hold the pocket to prevent the stickers from falling out of the pocket. I usually make my stickers in 3.75' x 5.75', so they are just perfect to be slotted into the 4x6 sized pocket.

p.s the hot air balloon and dew drop stickers can be found in my shop.


I added some journaling cards and Instax photo to the back of this pocket.


And for the sleeve, I actually store some washi tapes sampler and also paper clips. I just trim the 3x4 journalling card a little smaller than 3' and wrap washi tapes around. And for storing paper clips, I cut two slits with my trusty paper trimmer, and added the clips.


And more pics on how each sleeve looks like. This pockets are also perfect for storing memorabilia, receipts and name cards. I hope you have fun using some of your scrapbooking stash in your planners!

Have a great day ;)


Xoxo,
Sam


Evalicious products used:
    

Tuesday, May 12, 2015

Planner | Stretch Your Daisy Day Planner Pages with Planner Stickers

Hello everyone! I received my Daisy Day Planner May kit around first week of May so I didn't use it for any daily / weekly planning for May. Instead, I want to show you how I stretch the Daisy Day Planner pages to use them for planning for work. I normally use A5 sized planner for my work but I have recent gotten this LV agenda MM sized (equivalent to Filofax personal sized) as Mother's Day present. So I want to use this to plan my work and jot down ideas for my monthly Happie Planner Kit.  

P.S. I have been stamping a lot Simon the bunny and colour its shirt in various colour. I use it to decorate my May planner pages everywhere. 


See… You could see Simon peeking out from one of the pockets and also I love that Christine include Simon in this month planner charm. I am such a huge fans for planner charms. Can never have enough of these cuties. I cut down the planner stickers (which are designed by yours truly, available here) and slot them into the card slot pocket. The planner stickers are measured approximately 3.75' x 5.75' per sheet and I cut them into 4 tiny sheets for each piece.


I absolutely adore the notepad (with cute pencils illustration) in the May kit. 


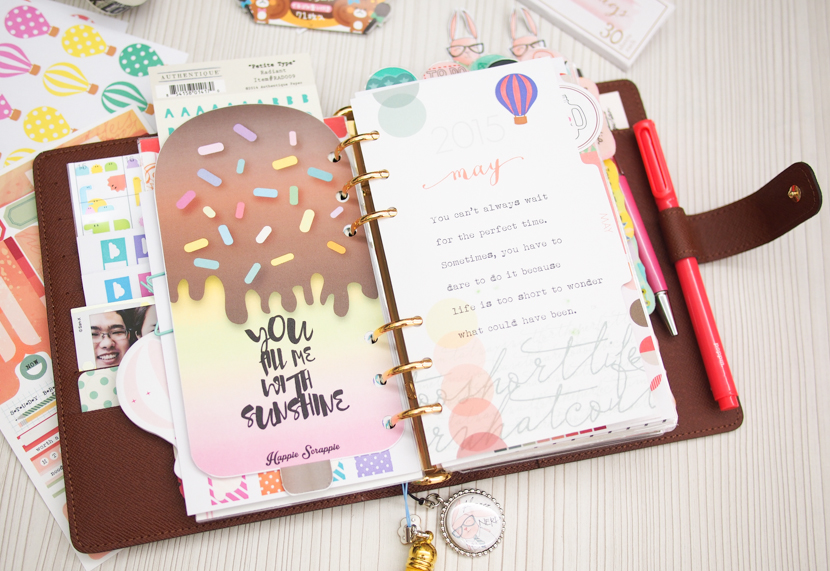
I punched holes in some of my planner stickers and slot them into my planner. I use a paper clip to clip the sticker sheets together. The popsicle page marker is a test print version of my June 2015 Planner kit page marker. 


I love the Cover page for the Cocoa Daisy May kit, and this is definitely my favourite cover page for all the Daisy Day Planner kits.


I hole punched the 4xx6 PL cards and decorate the card  a little with this month stamp set and round tags. 


My fave would be the back of this PL card. Right side is the front page of the Week-on-2-pages inserts. I love how this month inserts have notes section for the weekly. I use the note section to jot down ideas and inspirations for my June Happie planner kit.


I trim down the corner of the kraft paper bag that keep the planner kit. I love the word Enjoy Everyday,  add washi tape to one of of the side, then stuck it to the back of the PL card. It is just perfect for holding a few sheets of the 3x5 notepad papers in the kit.


For the week-on-2-pages inserts, I use some planner stickers to cover up the days (Monday to Sunday) and add title to each of the topic that I need to work on. I love that the weekly pages have 6 section, with light gray colour grid. Aren;t those cloud and hot air balloon stickers cute?


Back of the week-on-2 page pages: I use to record the colour combination that I want to use in my June planner kit. I colour the circle dot stickers with copic markers and stuck them down. I can easily refer to the colour combination when I work on the kit. And the right page is just white paper sheet that I use to doodle / illustrate the design for my future kits.


And here comes the Daily pages - I don't use the Daily to do for my daily planning. Instead, I cover up the title of each section with some banner / flag planner stickers. I use this to make a checklist for my task. I also use the dew drop stickers to highlight the important tasks / reminders.


I love this PL card that is included in the kit and added Simon the bunny here just to brighten up my days. 


I used to used these cute week-on-one-page inserts either for my baby journal or #listersgottalist challenge. But this month since I am using it for planning my future kits, I use it to write down quotes / saying that I found related to a particular theme (in this case, which is summer and sunshine theme). I absolutely adore the Daisy day planner inserts and I want to make it work for my planning. So covering up some of the days / titles with planner stickers, and use it for work planning is just a perfect way to stretch my Daisy Day Planner! 

Thanks for looking and have an awesome day ;)
XoXo,
Sam

Monday, May 4, 2015

Planners | Life's Sweet In My Daily Planner

Hi Dearie =) I hope you girls (and guys) have a great weekend over there! I had a rather relaxing (but tiring long weekend here) as we had public holidays on Friday and Monday as well. So having such a long weekend means I had not been working on my little online store or packing mails (since there is no mailman picking up the mail). I am feeling a tad tired as Baby #2 has been really active in my tummy and Ivan is staying home 24/7 with me due to school holiday.

When Ivan was sleep, I was craving for some sweet bubble tea. Unfortunately I gotta resist the temptation of fixing my sweet tooth as drinking anything cold would make me having terrible backache recently. My awesome gynae says I could basically have everything and anything I feel like but I found that drinking ice tea or eating ice cream cause my backache to be worsen.

So my solution for my sweet tooth is to make some sweet stuff for my daily planner. I have already made plenty of coffee & tea paper clips and book marks a while ago, so this time round I am making a dashboard and page marker to complete the whole theme.


 I use 2 pieces of journalling card (in 3x4) tape it down and sent it to my laminator, punch holes and they are just perfect size as page marker for my personal sized planner.


And here's my dashboard / dividers with a sweet coffee cup.  I am not a coffee person but my lactose intolerance has gone really worse since I gave birth to Ivan. So I am currently drinking a cup of coffee (with a tad of sugar, without creamer / milk) daily instead of my favourite hot cocoa.


I have also designed some to-do list and weekly inserts for my planners. I am thinking of putting them up in my (currently inactive) Etsy store soon. Do let me know if you are interested ;)

And here's the discount code for enjoy 15% off Shop Evalicious goodies: HAPPIESCRAPPIE15 and shop here =) *Happy Shopping! - it's time to grab some cute puffy stickers and typewriter stamps!)

For more ideas for making planner goodies, refer to the previous blog post:

Xoxo,
Sam

Evalicious products used:
    

Saturday, March 21, 2015

Feature Friday #2 | DIY Ideas for Your Planners / Filofax


Hello everyone! This blog post should be up yesterday but something came up so I could only post it up today. I hope this post would inspire you or at least give you some ideas to make use of  your Cocoa Daisy goodies and art supplies to personalise your own planner(s).This is a photo-heavy post with plenty of planner DIY ideas - from making your own paper clips to stickers. So do sit back and grab a cuppa while scrolling thru this post.

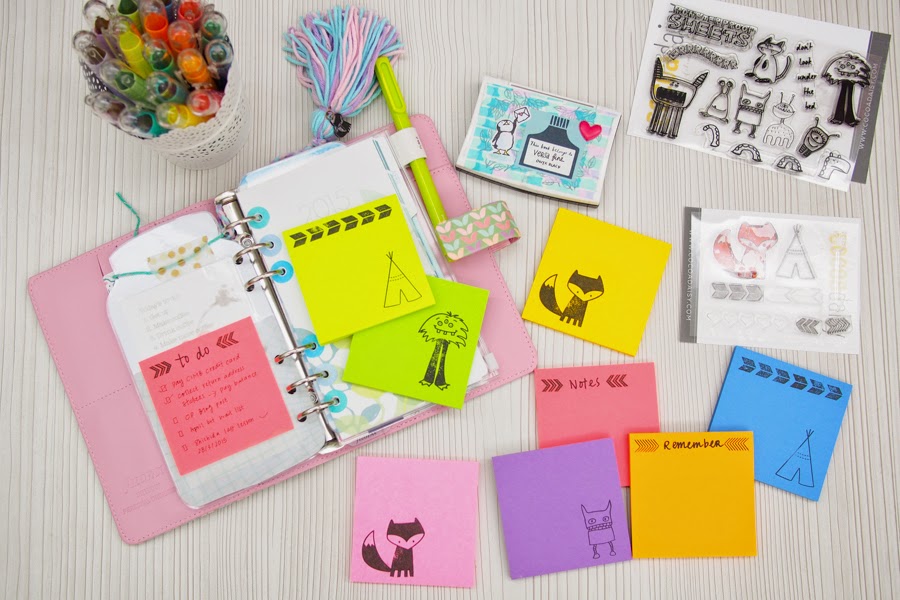
1. Stamping on the good ol' Post It's


The regular post it's are boring but their adhesive is way better than the cutesy one that your could get from Target or Daiso (p.s. those are so cute but they never stick / repositionable).


I use the Get Foxy and the Under The Bed Stamp set to prettify the post-its. Even my 2-year-old is obsessed with these monster stamps and keeps asking me to stamp these on his arms.

2. Make your own stickers


Okay, this is no-brainer. All you need to do is to stamp on a piece of sticker paper (you can get them from Amazon or any office supply store) and cut them out. I like to stamp a bunch of these stickers using my favourite stamp sets and cut them out whenever i have free time or watching YouTube. I keep a bunch of these in a zipper pouch in my planner.


I also likes to colour the white reinforcement stickers and small label stickers using Copic Markers. Of course you can colour the stickers with highlighter markers, distress markers or even water colour.


Just in case you are wondering, I am using these white reinforcement ring stickers and small label stickers from Daiso - I love love love them as they are repositionable / removable.


This is how the stickers look like in my blank planner pages.


3. DIY Paper Clips


I love these two stamp sets a lot. So I stamped the fox and monster on a piece of white cardstock, and fussy cut the stamp images. You can certainely glue the paper clips to back of the cut image using liquid glue / hot melt glue (I use Helmar 450 Quick Dry glue and they work really well). To make the paper clips sturdier, I laminated the cut image with hot laminator before gluing the paper clips.


The paper clips are so cute in the front pockets of my planners. >_<

4. Cute Planner Tassels for Your Planner(s)


I didn't get the the craze of hanging a huge tassel on my planner as they are bulky and don't look practical at all. My bestie wanted a tassel (in unicorn colour) for her planner. So I googled tutorial on how to make a tassel and found this tutorial super useful.


To make the tassels even cuter, I stamp the foxy stamp on a piece of shrink plastic. If you need a tutorial on how to stamp on shrink plastic, I had a blogpost here. You can also make the shrinkies into cute pen charms / planner charm. I have even more DIY planner decoration ideas for you in the future blog post. So stay tuned, planner girls!

Xoxo,
Sam